PLEASE be mindful of copy right and privacy infringements. This is a fun tool, assuming you use video and images with full consent.
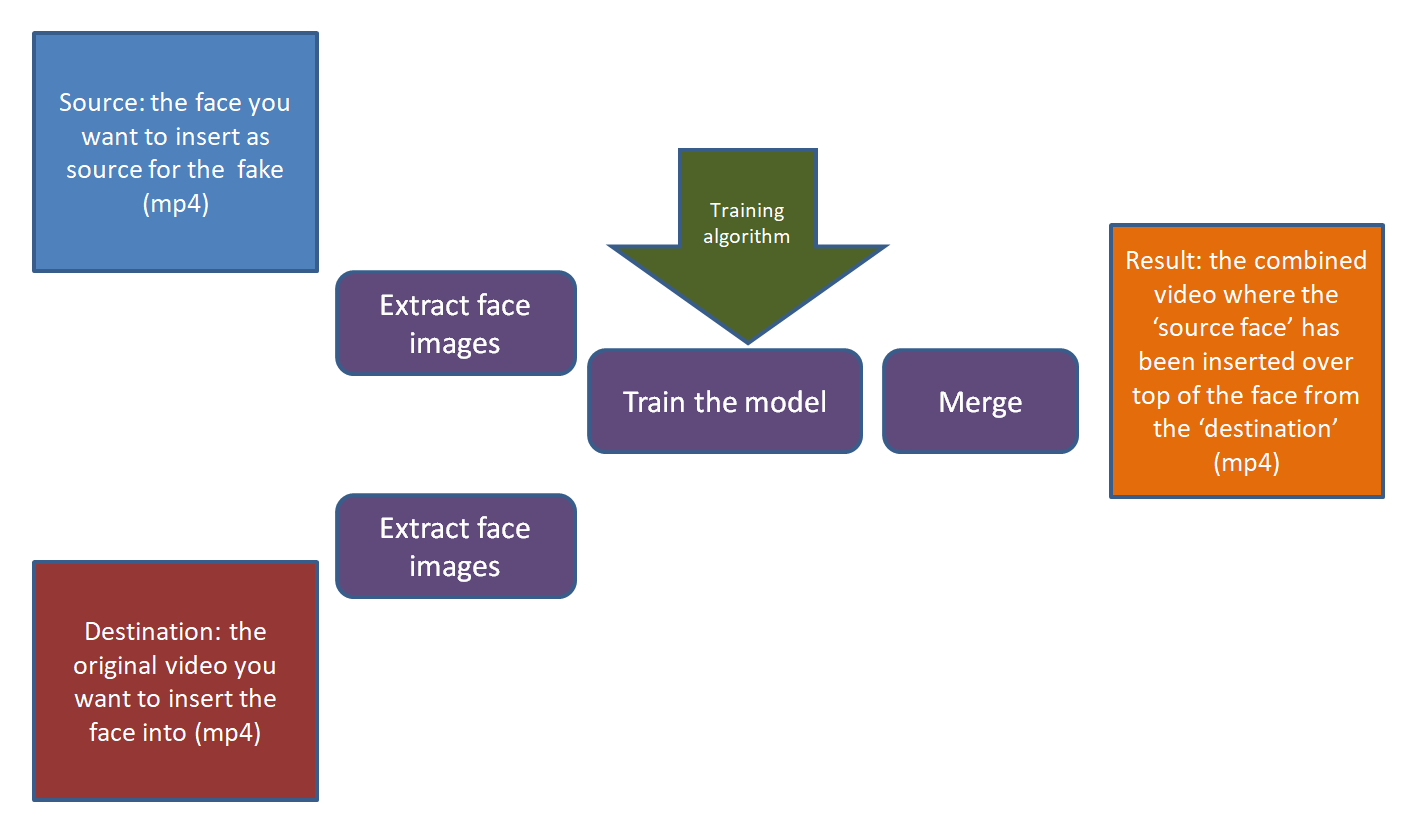
Creating a deepfake with face substitution has a number of steps:
- Decide on your 'source' materials (video and images) that you want to overlay into another video
- Decide on your 'destination' material: the video that you want to alter into your own creation
- Create the folder structure the software expects
- Using routines to split out the video into frames
- Training the model on your source and destination: shape of face, expressions, etc. The model already knows how to find a face in an image and will look at each frame to learn.
- Executing the 'generative' step: merging what it has learned about your 'source' face over top of your 'destination' face by painting in the area of the face in the destination video with your source face and the best matching expression.
- You can retain the original destination audio track, or of course use one of the audio substitution models to create or substitute voice as well.
Install the software
Check here for the build version compatible with your GPU: https://www.deepfakevfx.com/tutorials/deepfacelab-2-0-installation-tutorial/
Had to find out what my GPU was again using Task manager, and realized that my GPU driver was a year out of date. Probably good to upgrade :)
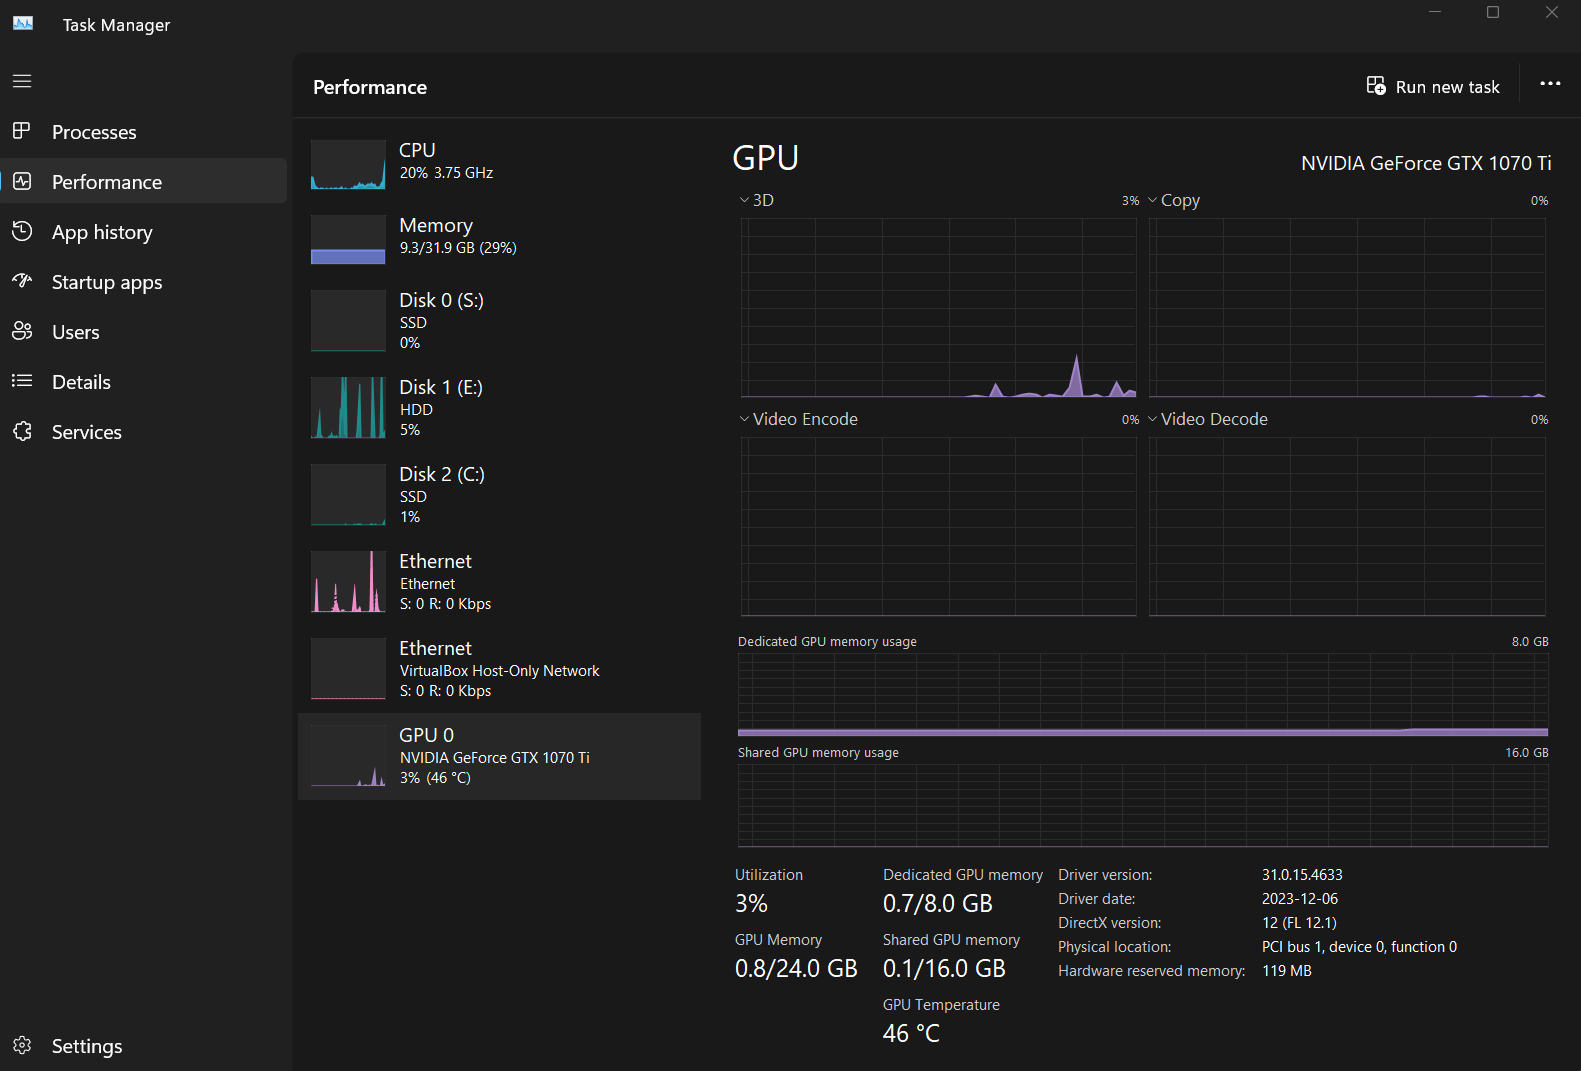
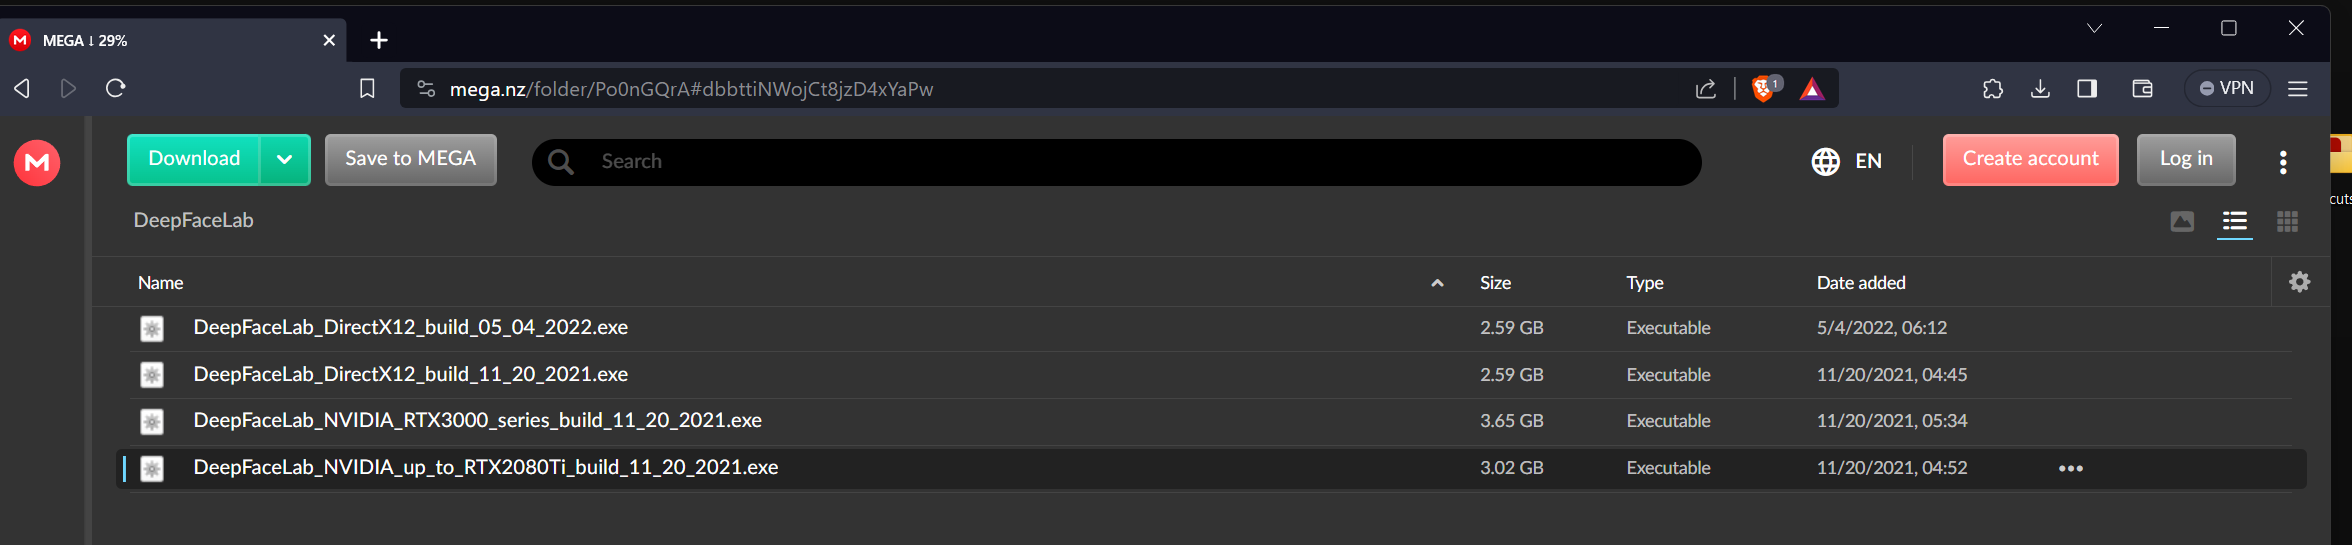
For my NVIDIA GEforce 1070ti, which supports CUDA version 6.1, I will go with the 'build up to RTX 2080ti
More about CUDA at wikipedia.
Then, from the github page, scroll down to releases
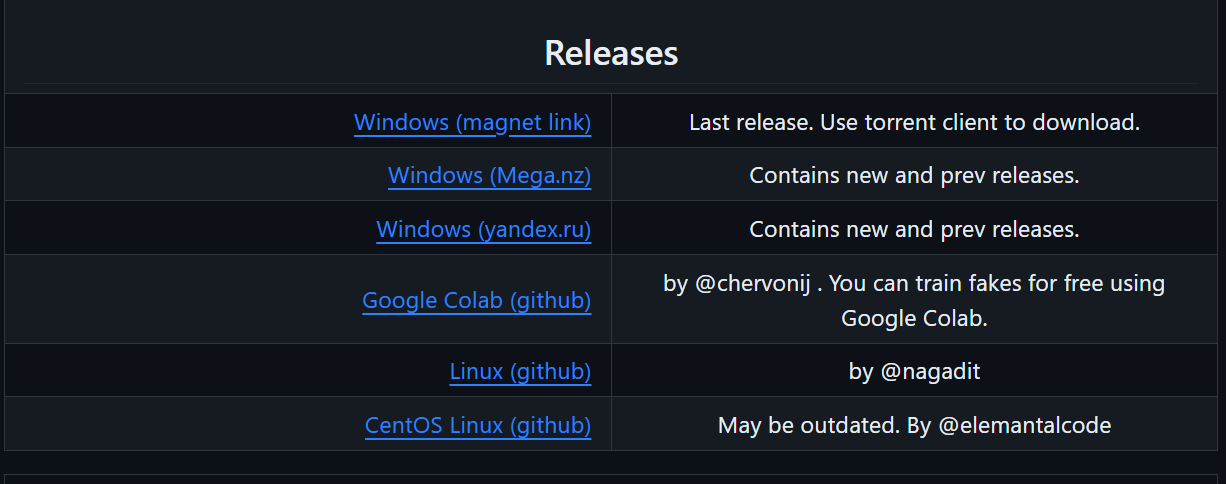
I choose the download from mega.
Create the required folders and files with the right names
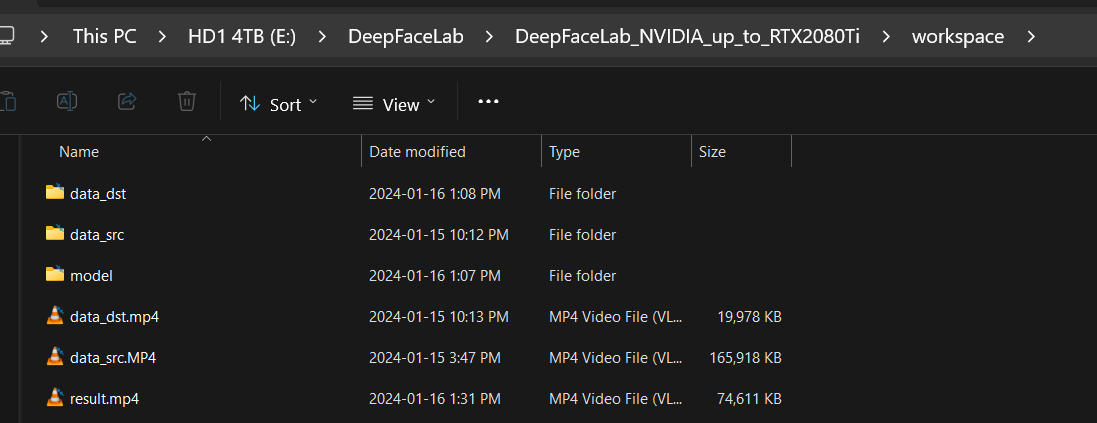
DeepFaceLab will expect your "face to be used" in 'data_src.mp4' and the video for "the face to be inserted into" as data_dst.mp4' and it will create an output file called "result.mp4".
The install will create these folders for you.
One of the processing steps will split out the videos into frames using the folders 'data_src' and 'data_dst' so when you start a new training, make sure you have these folders empty (or rename the old ones).
Process the input and create the output
Great 'getting started' guides:
https://mrdeepfakes.com/forums/threads/guide-deepfacelab-2-0-guide.3886/
https://techwiser.com/how-to-use-deepfacelab-on-windows/
https://www.deepfakevfx.com/tutorials/deepfacelab-2-0-installation-tutorial/

and the tutorial is very clear about how much you should update the _internal folder - not at all :)
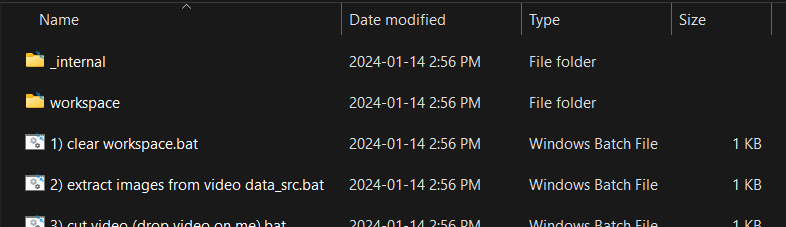
The main folders holds a vast number of .bat scripts and for convenience, they are numbered in sequence. Their names are very self-explanatory.
This video tutorial is old, but gives a great step-by-step to get started and you can follow each step exactly with the sample videos the install provides: https://www.deepfakevfx.com/tutorials/beginner-deepfake-tutorial-deepfacelab-2-0/
I used the quick & dirty training type 'Quick96 as suggested in this video, and it worked great, just using the defaults. Here are the scripts to run in sequence, accepting all the defaults with the batch file sequence number:
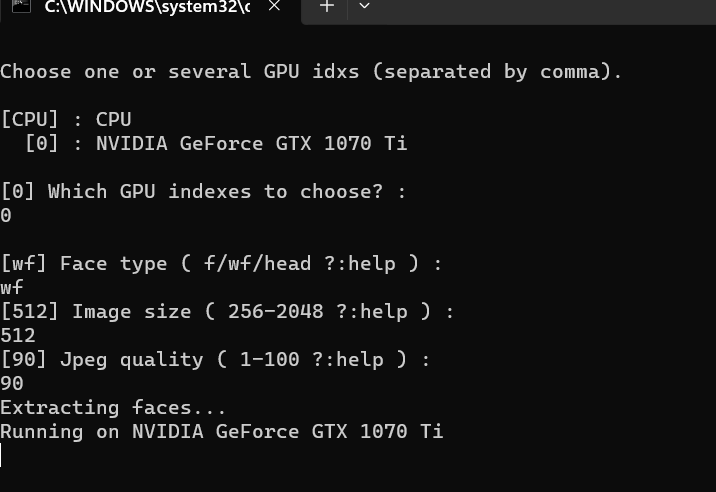
- extract images from video data_src
- extract images from video data_dst FULL FPS
- data_src faceset extract
- data_dst faceset extract
To verify the results
4.1 data_src view aligned result
5.1 data_dst view aligned result
Training & producing the output
- train Quick96
- merge Quick96
- merged to mp4
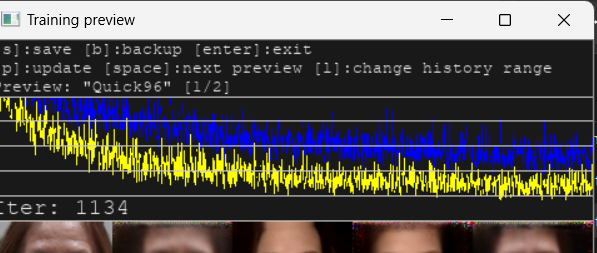
Interestingly, different from Stable Diffusion, you don't specify the number of epochs etc to train for - you watch the loss rate as the training is running (step 6), and manually decide to stop. The loss graph is displayed in the preview window. Check for a stable loss rate that seems to no longer decline.
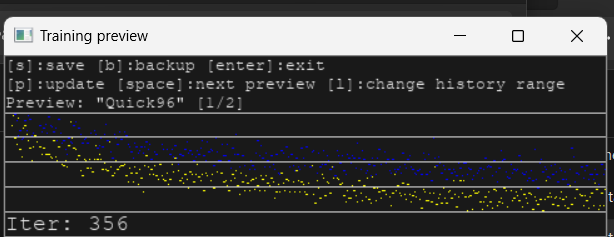
I like using the graph, but the actual loss rate is also displayed in the command window, last number: 0.6597 in this case (I'd like it closer to 0.4 or 0.3). You have to hit 'p' on the keyboard to get the graph to refresh in the preview window, which I keep forgetting :)

and you can see the loss graph still declining.

I didn't think the tutorial explained the 'blur' and the 'erode mask' very well.
- Your 'erode' parameter indicates how tight you want to crop, i.e. how much of the original frame should be substituted (i.e. the gap it is creating to paint your overlay into).
- Your 'blur' parameter blurs the edge between the resulting face overlay and the original frame.
This page https://www.deepfakevfx.com/guides/deepfacelab-2-0-guide/ outlines more detail and better explanations, and also explains how to go beyond using the defaults.
I did redo the source file to match the lighting in the destination better - the destination video I was trying to match had nice diffuse studio lighting, and our first take was in the kitchen with just potlights from above.
The interesting and terrifying thing is that all I had to do is follow the steps in the tutorial - no knowledge or special tools required, and with a couple of hours I had a somewhat believable deep fake!
Comments
Hi vancurious.ca…
Hi vancurious.ca administrator, Your posts are always a great source of information.
Add new comment