
In case you're wondering - yes, yes you can make your home network more secure, with a little bit of effort and money.
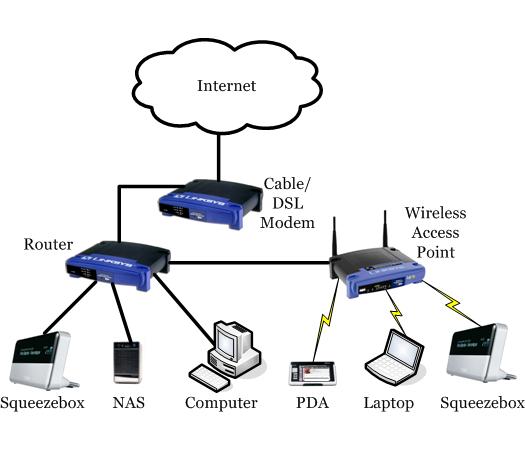
A previous article described the typical home network, and in this post we'll explore how to improve on it. This setup is more secure than the basic setup your ISP gives you. It is also more complicated, and there are certain scenarios it may not support due to the double NAT-ting - more about that later. This improved setup assumes you are willing to spend a tiny bit of money (~$200) and a couple of hours of your time. Note that this is not a recommended architecture for a small business.
If you are willing to invest more time and money, read this post for a recommendation to do your home network architecture right in a way that will also work for a small business.
The post "some networking concepts explained for the non-techie" that aims to explain the basic concepts, and reading this first may help you understand the rest.
Making your home safer
1 Act on the recommendations in this post about easy improvements
2. Implement Network Segmentation.
Notice how, if you live in an apartment building, you have one key for the front door, and one key for your apartment? This ensures that anyone who manages to sneak into your building, cannot just walk into any of the apartments! Network segmentation achieves the same thing - even when someone manages to get into one area of your network, they cannot just barge in to the next one.
In networking, we will define certain areas as 'untrusted similar to the lobby of your apartment building, we will give you a key (i.e. password to the guest wifi) to get in to drop off the mail, but we don't want you barging into rest of the building! We also want our discussions inside our apartments to stay private and will keep our door closed so someone in the lobby can't listen in.
That, in a nutshell, is what network segmentation does, and you can find below how to set it up for your home network.
A better home network setup
1. Segment your network
Creating two network segments is most easily done by acquiring two routers. If you can find a router that can create more than one network and you know how to do this - go for it and make it work with a single router. This is a better setup, but a router that actually provides two separate networks is difficult to find. Many routers advertise the ability to create a guest network, but this actually the same network with a different name.
If not, get two; routers are cheap. Note - you could also use the ISP's modem as one of the routers, but for simplicity sake I'm talking about two routers in addition to the ISP modem.
- Router #1 will provide a network for all devices that should not be trusted implicitly: your guests' devices, and especially any "IOT" devices: your smart TV, your home assistant (Alexa, etc) - and yes, you really should not trust these things, they are programmed to collect your data from your network and share it back to the manufacturer, and they are easily and frequently compromised (i.e. hacked)
- Router #2 will provide a network for your trusted devices: your own computers, your own mobile phone, etc
Set up the first router to create the untrusted network segment
- Your own routers are your first line of defense, now that your ISP modem is no longer doing this job.
- Setup the first router: the first router will provide the untrusted network segment (a "DMZ"). Use an ethernet cable to connect your computer or laptop to the first router, plug it into ANY port except the WAN port (which may be labeled "internet"). Do NOT yet connect it to anything else. Your router ports may look something like the picture below
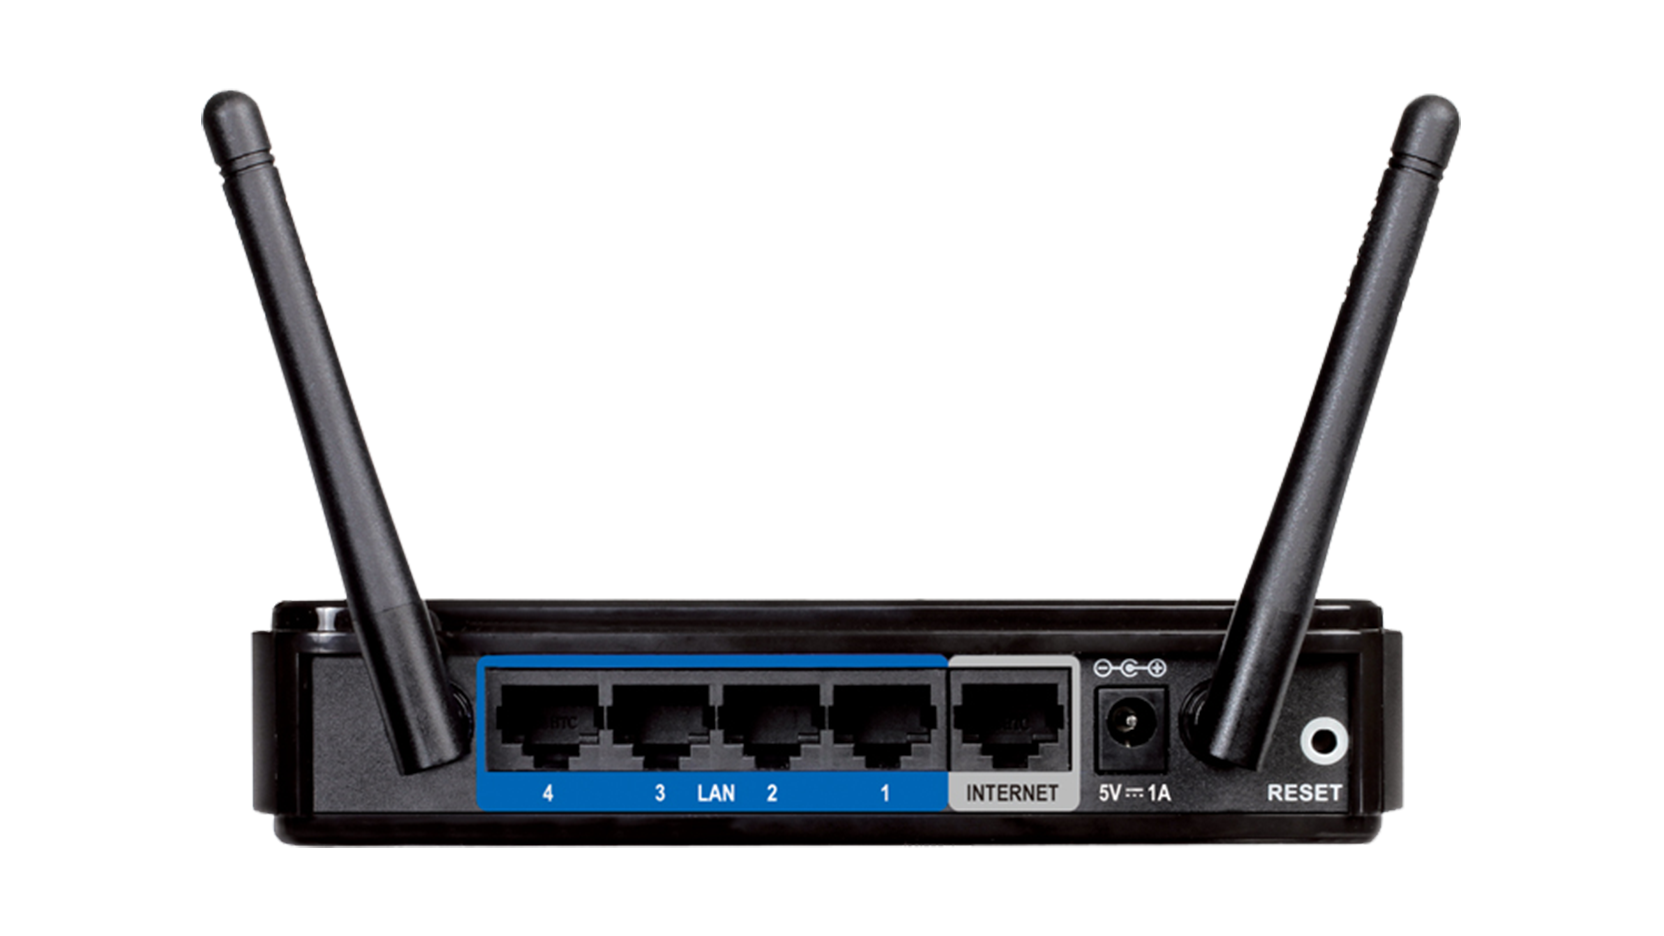
- With your computer physically connected to the first router, open a browser and type the IP address four the router into your browser's address bar (you can find this in the install instructions). You should see the router configuration screen in the browser.
- In your router configuration screen, look for the different menu options. You should have at least the following, and they may be named slightly different see the sample below (and refer to the router install instructions):
- 'WAN' or 'internet
- 'LAN' or Network
- WIFI or Wireless
- We will set up this first router to have an external facing IP address assigned by the ISP, and a pre-configued internal IP address where internal devices can reach it:
- To the outside world, we'll choose to request a public IP address from your ISP. Go to the WAN configuration screen, and select "DHCP". This works, because your ISP is kindly running a DHCP service - and when your router asks for an IP over its WAN port , the ISP will provide it. Once assigned, your router can be addressed from the internet with that IP address.
- To the inside world, your home network, we will have a static IP for the first router. So go to the LAN configuration screen and set up an IP address.
- It does not really matter what IP addresses you pick other than using an 'unroutable' range for anything internal to your network. The internet has been configured to not allow traffic to be routed to these IP addresses, which provides another layer of security. There are three sets of unroutable ranges (check the linked page) - recommend to pick one set for the untrusted segment, and one for the trusted one.
- So consider using an address in the 192.168.0.x range for the first router, for instance 192.168.0.1. Update your documentation and install guide to remember this IP - you will no longer be able to reach the router on your home network except with this new IP address!
- On the same LAN configuration screen, select the option that allows your router to provide DHCP the first router will assign IPs for all untrusted devices connected to it. Pick the range of IP addresses you want to assign to your first (un-trusted network), for instance 192.168.0.2 to 192.168.0.10 if you think you'll have 10 or so devices. Remember that you may have assigned 192.168.0.1 to the router itself, so start the range at 2!
- Check that your laptop has received an IP from the router (in your network configuration settings), however, you will not yet have an internet connection.
- Also test that you can still connect to your router: type the IP you gave it (for instance 192.168..0.1) into your browser's address bar
- Finally, set up the first router to provide WIFI to the untrusted devices using the WIFI configuration screen. You could call this network "GUEST" or "IOT" to remind yourself it is the untrusted one.
- Remember that this is also the wifi you give to your guests, so pick a password that is easy for you and your guests to remember but not easy for a random person to guess.
Now:
- Have your ISP configure their magic box (the modem) to 'modem only' (bridge mode, pass-through mode, or whatever it is called for this modem). You are now no longer using the modem's to provide WIFI or NAT - it is just passing the traffic from the internet to router connected to the modem.
- Connect the WAN port of the first router to the ISP modem.
- You should now have internet connectivity on your laptop.
Set up the second router to create the trusted network segment
- Setup the second router: it will provide the trusted network segment.
- Disconnect your computer from the first router and connect it to the second router. Set up the second router (go to it's configuration screen by using the default IP address set up by the manufacturer in your browser's address bar) in the same way as the first one:
- requesting an IP address for itself from a DHCP server on the WAN port
- providing IP addresses to the trusted devices as a DHCP service on the LAN port. Choose again an 'unroutable address range, but a different one from what you set up for your first router. So perhaps pick from the 10.0.0.x range. Call the second router 10.0.0.1 and provide 10.0.0.2 to 10.0.0.10 as a range to your internal devices. Note that in the diagram below they have decided to use the 192.168.0.x range for both routers - it works, I just find that using a different range creates more clarity.
- Again, don't forget to write down the IP address you gave to the second router! The default one will no longer work.
- set up the second router to provide WIFI to the trusted devices using the WIFI configuration screen. Call the network whatever you like :)
- Since this is the wifi that you will use for your devices, and you can set it once and forget it - use a good strong password.
Now connect everything together
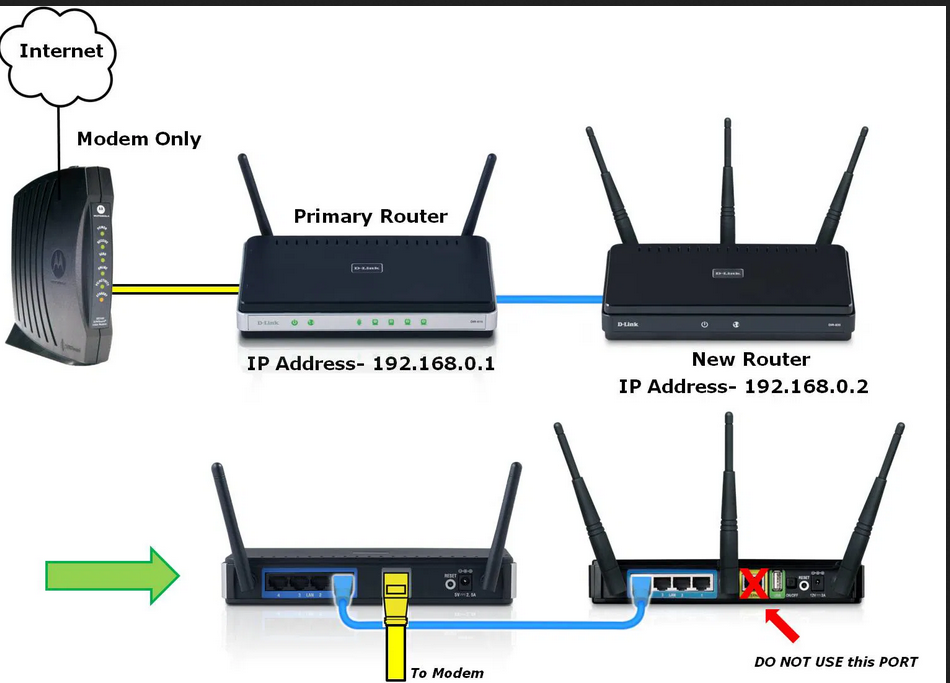
- connect the WAN port of the second router to any port but the WAN port on the first router
- Connect your untrusted devices to the first router, either wired, or by configuring them to use the "GUEST" wifi network.
- And connect your trusted devices to the second router - wired, or by configuring them to use the other wifi that you've set up.
And there you go! You have a more secure home network setup by implementing two different segments.
Add new comment