Big shout-out to my partner: who provided the experience on what settings work in which cases as they have far more patience than I do to experiment:)
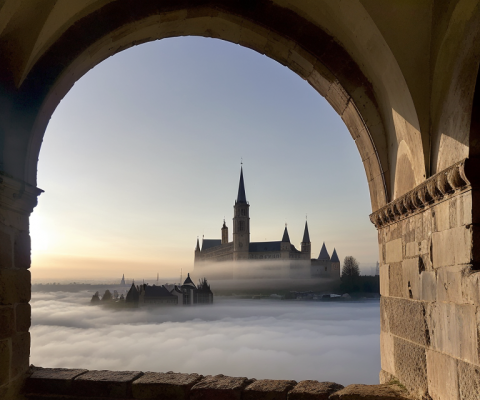
I wanted to try to create a LoRA that would help generate images that looked like a medieval city. I had lots of pictures from our trips to Europe, so used those. Make sure you avoid any copyright infractions with your selection of images to train on!!
LoRA stands for Low Ranked Adaptation and is a type of training method for fine-tuning Stable Diffusion models, more very well written information here. As this site explains: instead of training a new model from scratch, a LoRA allows us to re-use an existing model as the starting point, and train only for the specific subject while keeping all the generic training from the base model (in our case Stable Diffusion 1.5). This will allow for maximum re-usability and compatibility since everything is based on this - even if you plan to use your LoRA against a different model, it still seems to work best - and give you the most flexibility.
Here are the steps I followed, with the details for each step below.
- Assemble your images
- Use Kohya to start the captioning process, then check & manually update each (which will be many)
- Configure Kohya for training
- Use Kohya to create the LoRA
Assemble the training material for the subject: your images
You no longer need to worry about aspect ratio or cropping, other than any cropping to make sure the images have the specific content you want to train on - and not the things you don't want. For instance, I've tried to crop out any cars out of mine, since there were few of those in the middle ages :)
The more detail & high resolution the better. Let's say that again, the quality of your training set is critical. Get the best pictures you have of the highest quality you have. Fewer high quality pictures is better. Not just resolution - but how clearly the image shows the concept you're trying to train. Don't be like me and get smitten by the beauty of the scenery or the memory that the picture brings up. What will the training learn from this picture? It is not about the scenery. Ask yourself "What does this picture represent"? If two pictures are very different and we're telling the neural net that they are both 'church interior' - would you get confused, even you, as a human, when we are wired for pattern recognition? Would you be able to see the pattern and establish the rule? You may need additional captioning to tell the neural net what the difference is if you do choose to use these two very different images.
Remember that the neural network is a statistics machine. It uses probabilities to generate outputs based on your inputs. If it cannot figure out the probabilities, your generative images will not be great.
Start Kohya
We use Kohya in this example; you can install it from here: https://github.com/bmaltais/kohya_ss

Use Kohya to generate the image captions
Captioning is what classifies the concept in the neural net, producing a correlation of the characteristics of an image and the words to describe it, and it is how the generative AI will interpret your prompt to produce an output.
Kohya has a feature to generate the image captions and will create a text file for every picture. The captions will form the basis of what the neural net will learn and especially how you can prompt for the generation.
First, use Kohya to caption all pictures, and then we can describe individual pictures that may have a specific element; we can add to the caption file.
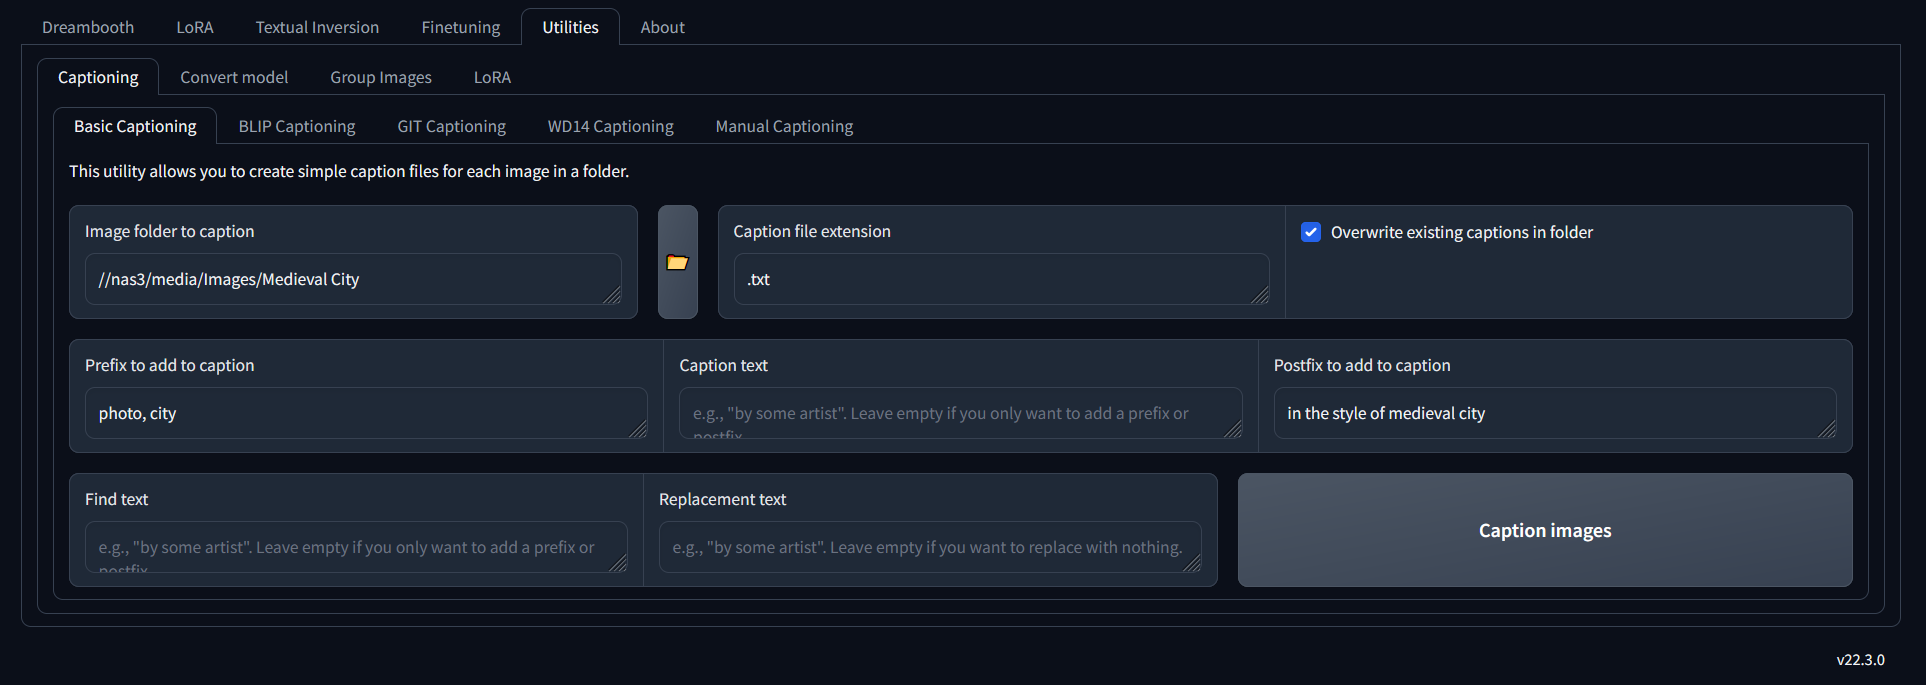
Once you've ran the captioning, you'll have a text file for each picture that contains the tags.
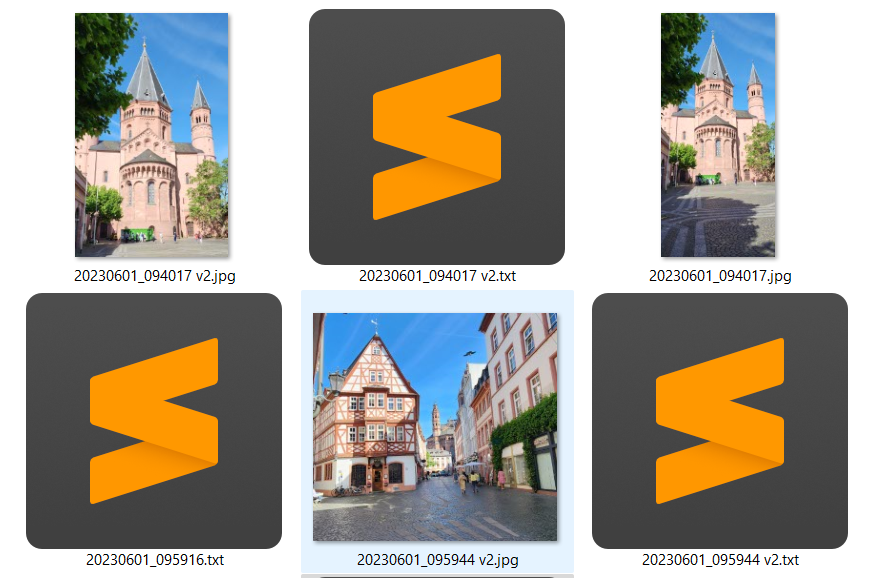
Now, go through each file, and check the tagging. Think about 'if this was the prompt, would I expect this result'. Only include tags that are something AI would not already know about, and less is more. Make sure you tag especially for what you are trying to train, so don't describe all the other stuff in the picture.
Note that there are HUGE debates online on how to best tag images, and I'm just giving you my opinion and thought process!
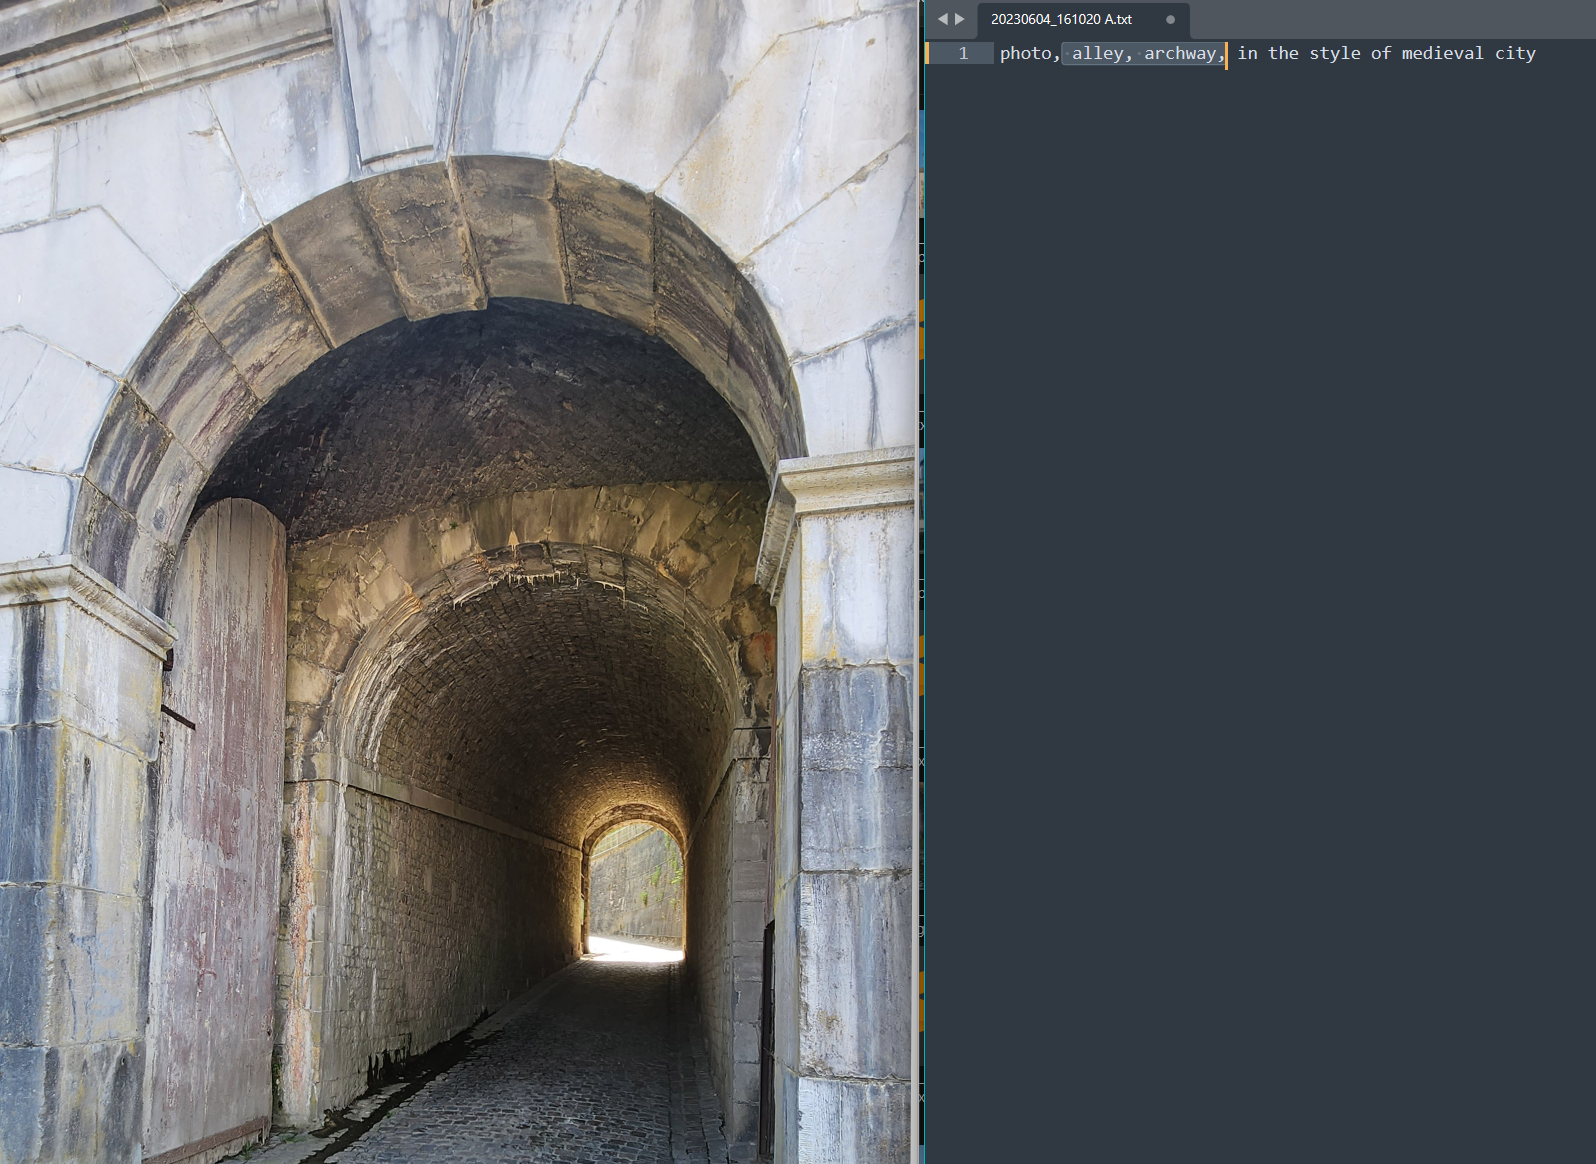
For example, the picture below isn't really 'the city', so I've updated the tags to be 'alley' and 'archway'
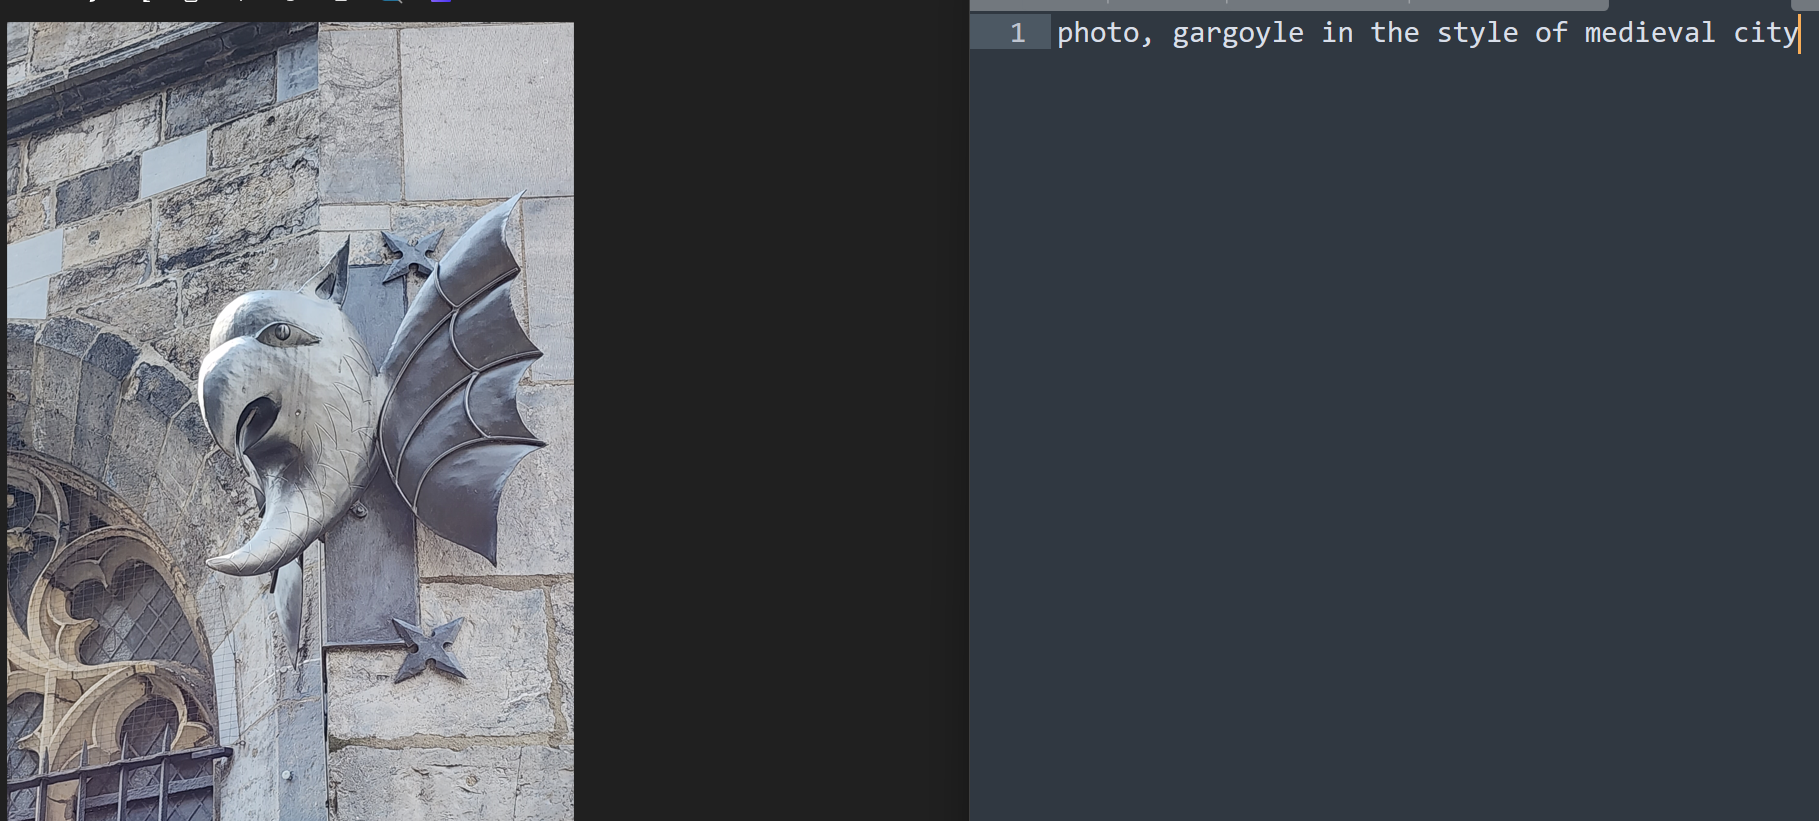
For this particular one, I want to highlight the gargoyle since it is also not showing a city scape:
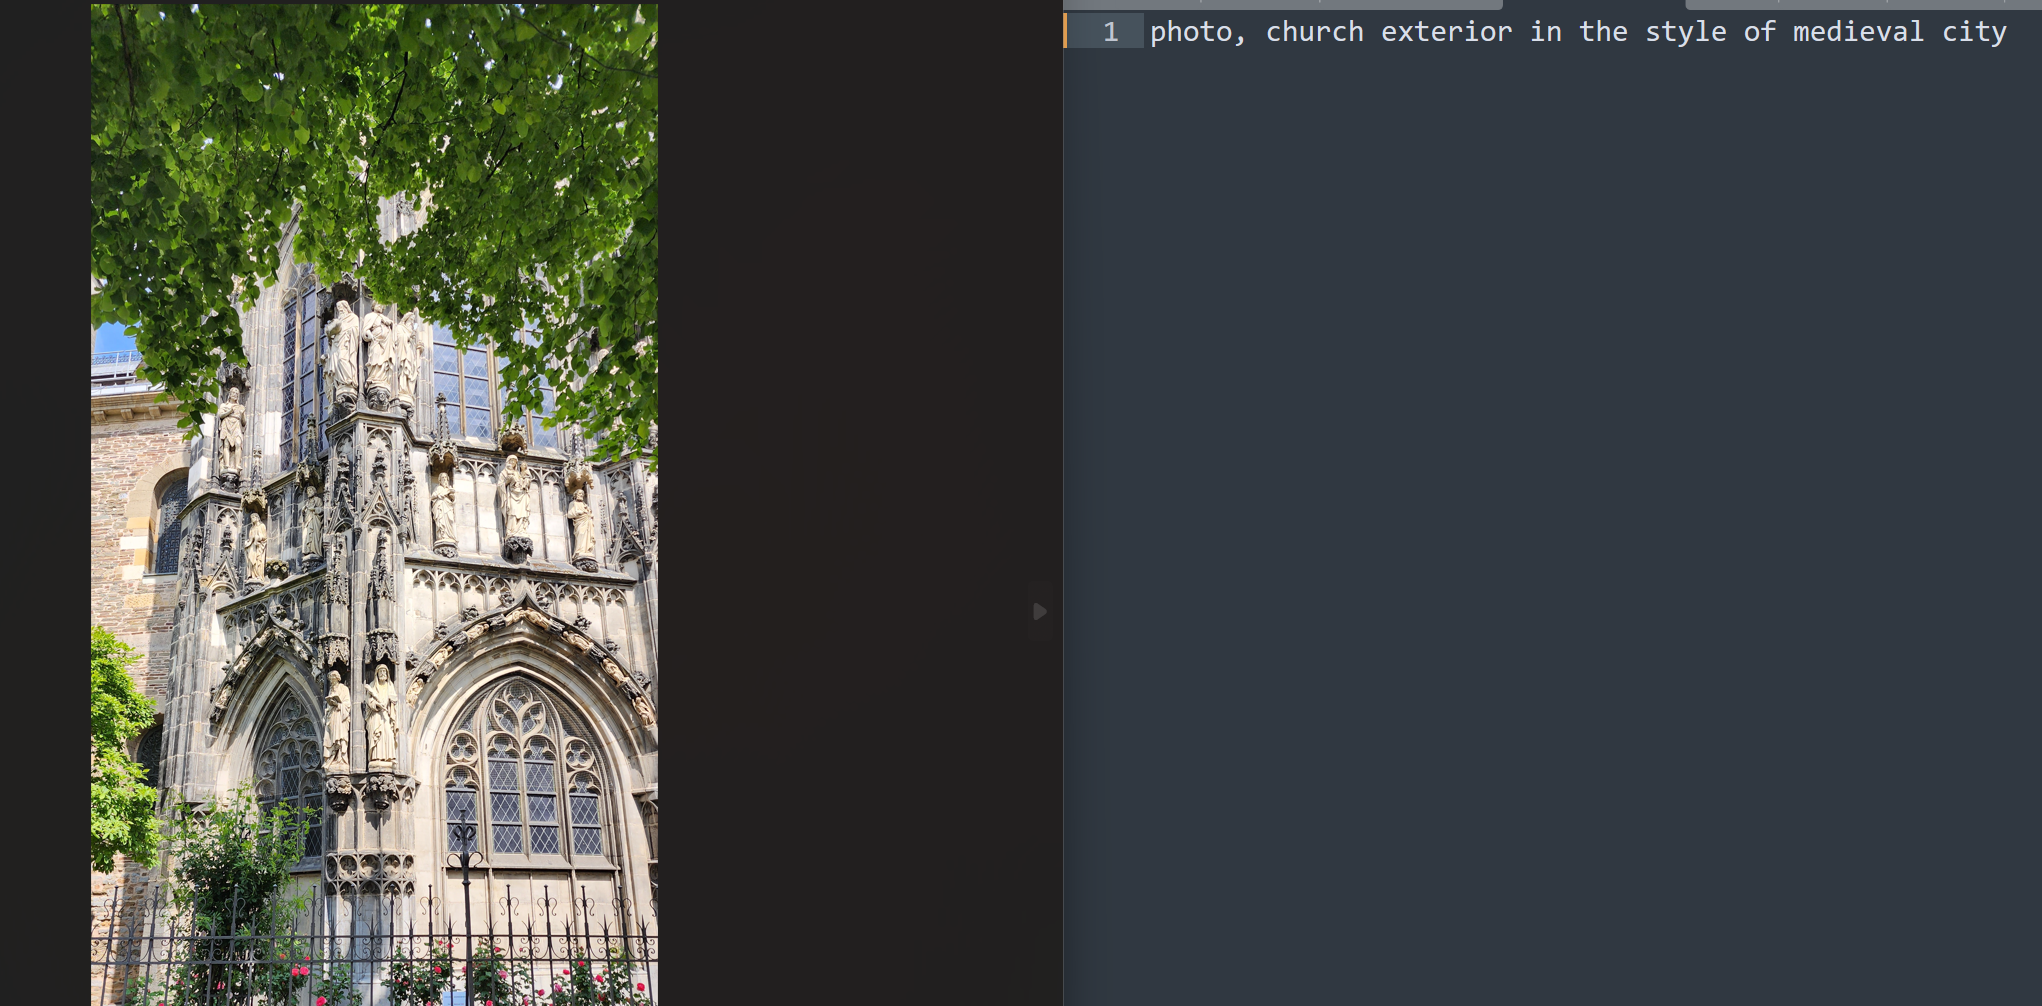
For the picture below, I was debating whether I should include that most of the picture is 'trees'. My thoughts were as follows:
- I assume the AI already knows these are trees
- I'm not trying to train or focus on the trees
- My pictures have a mix of churches with trees and churches without. If all of them had trees, I may want to specify that there are 'trees' so that as part of the training, the 'trees' don't become part of the 'church' concept
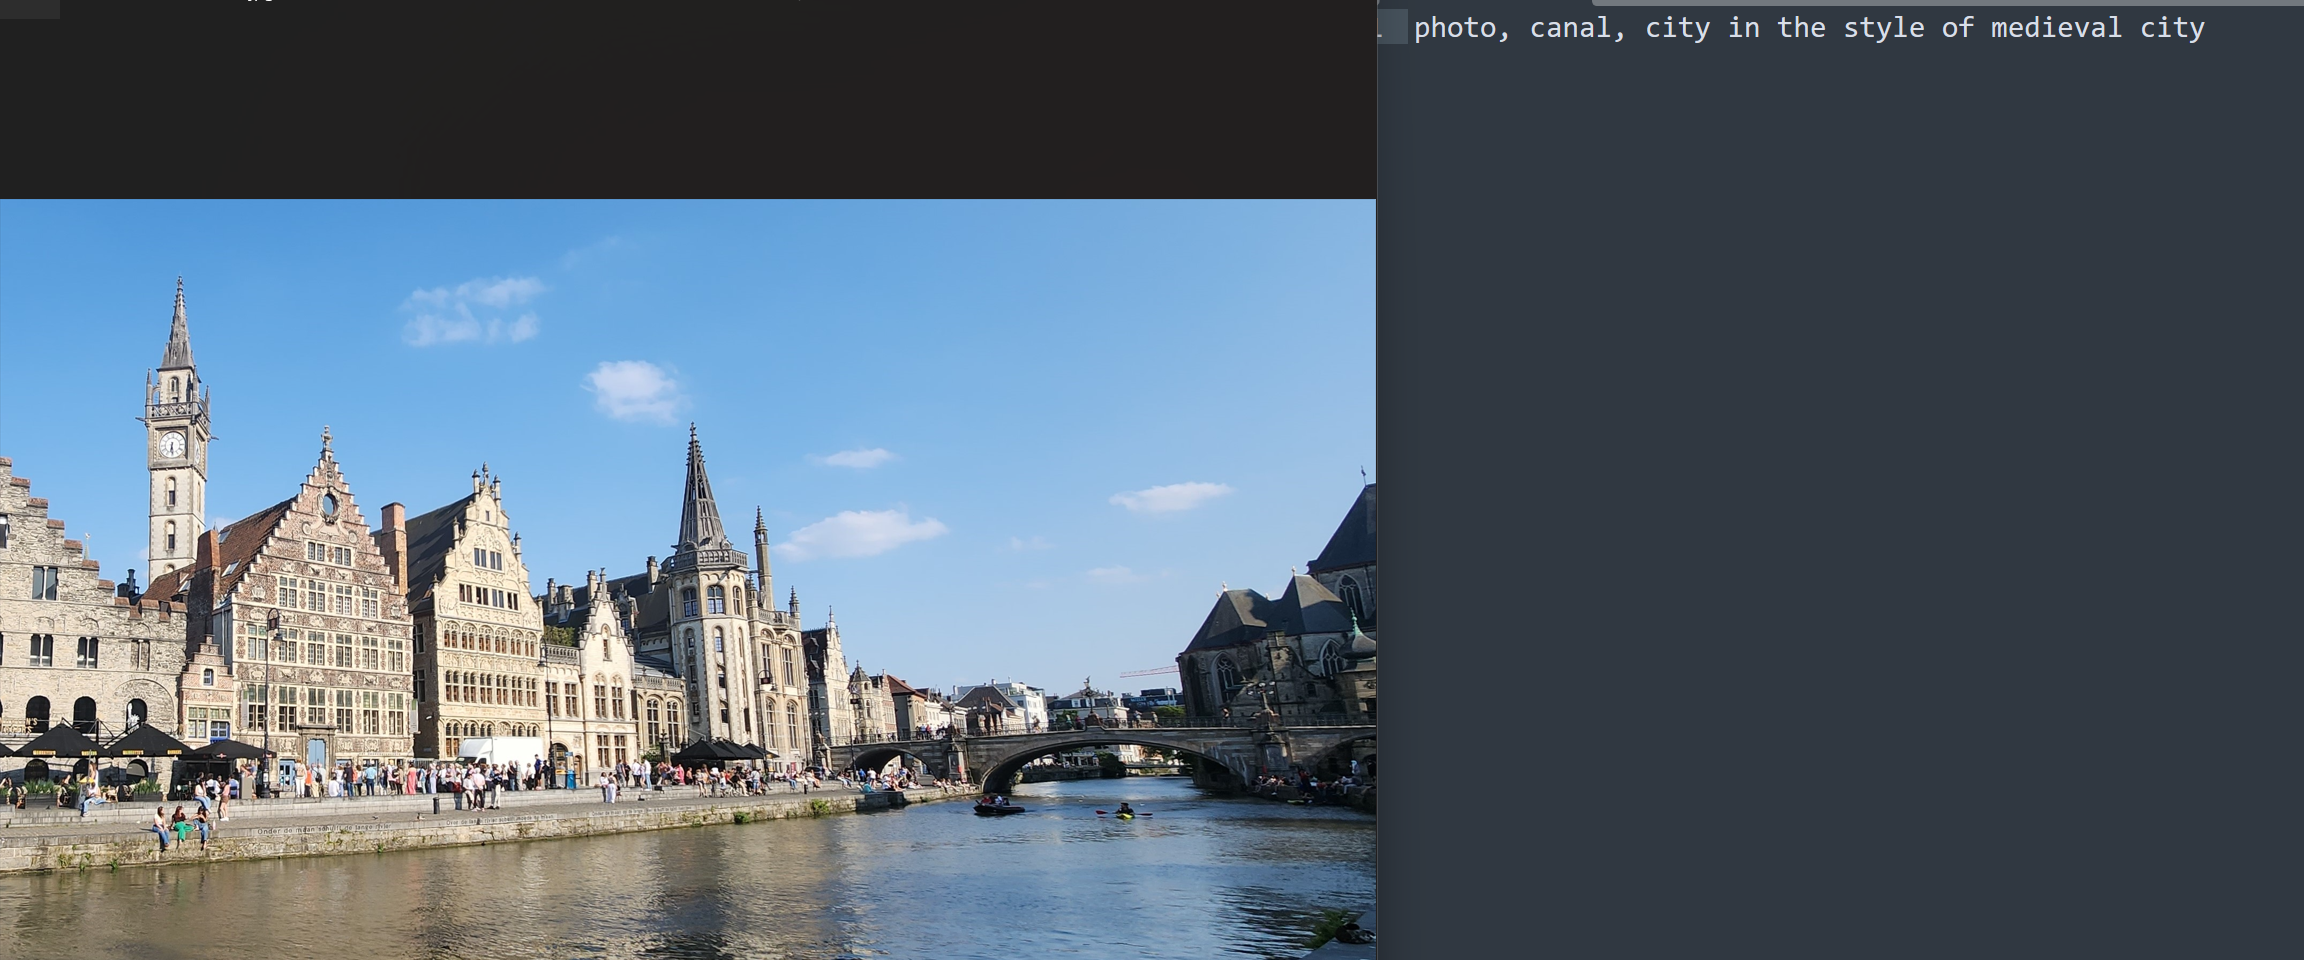
But for this one, I did want to call out that there was a canal:
Training using Kohya
Folder structure
Set up the folder structure required by Kohya:

It does not matter what folder they're in, but these are the subfolders you need.
Move the folder(s) with your images into 'img' folder. I made three folders for the three subjects want to generate for.
You have to follow a specific naming standard for the folder names:
NumberOfRepeats_Subject ClassTag
- Number of Repeats: how many times should the images in this folder be 'duplicated' in the weight of the training, compared to the images in the other folders. How many times the contents of this folder will be repeated per epoch
- Subject: identifies the primary thing
- ClassTag: identifies the generic category of thing
Note that the current discussions seem to say that what you pick for "Subject" and "ClassTag" does not seem to matter hugely, but the NumberOfRepeats does. Also, because of the 'space' that separates the "Subject" and the "ClassTag" - does that mean the "Subject can be one word only? It doesn't seem to work that way. Anyway - if we learn more later, we'll update!
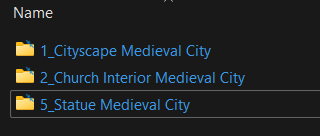
I have a lot fewer pictures of the 'interior' and even fewer of the 'statue', so to make sure they don't get outdone by the exterior, I've upped their repeats.
I maybe should have created a separate folder for 'archway' instead of just tagging it... I could have increased the repeats in that case. We'll see how it goes - so much of this is trial & error!
Configure the training run
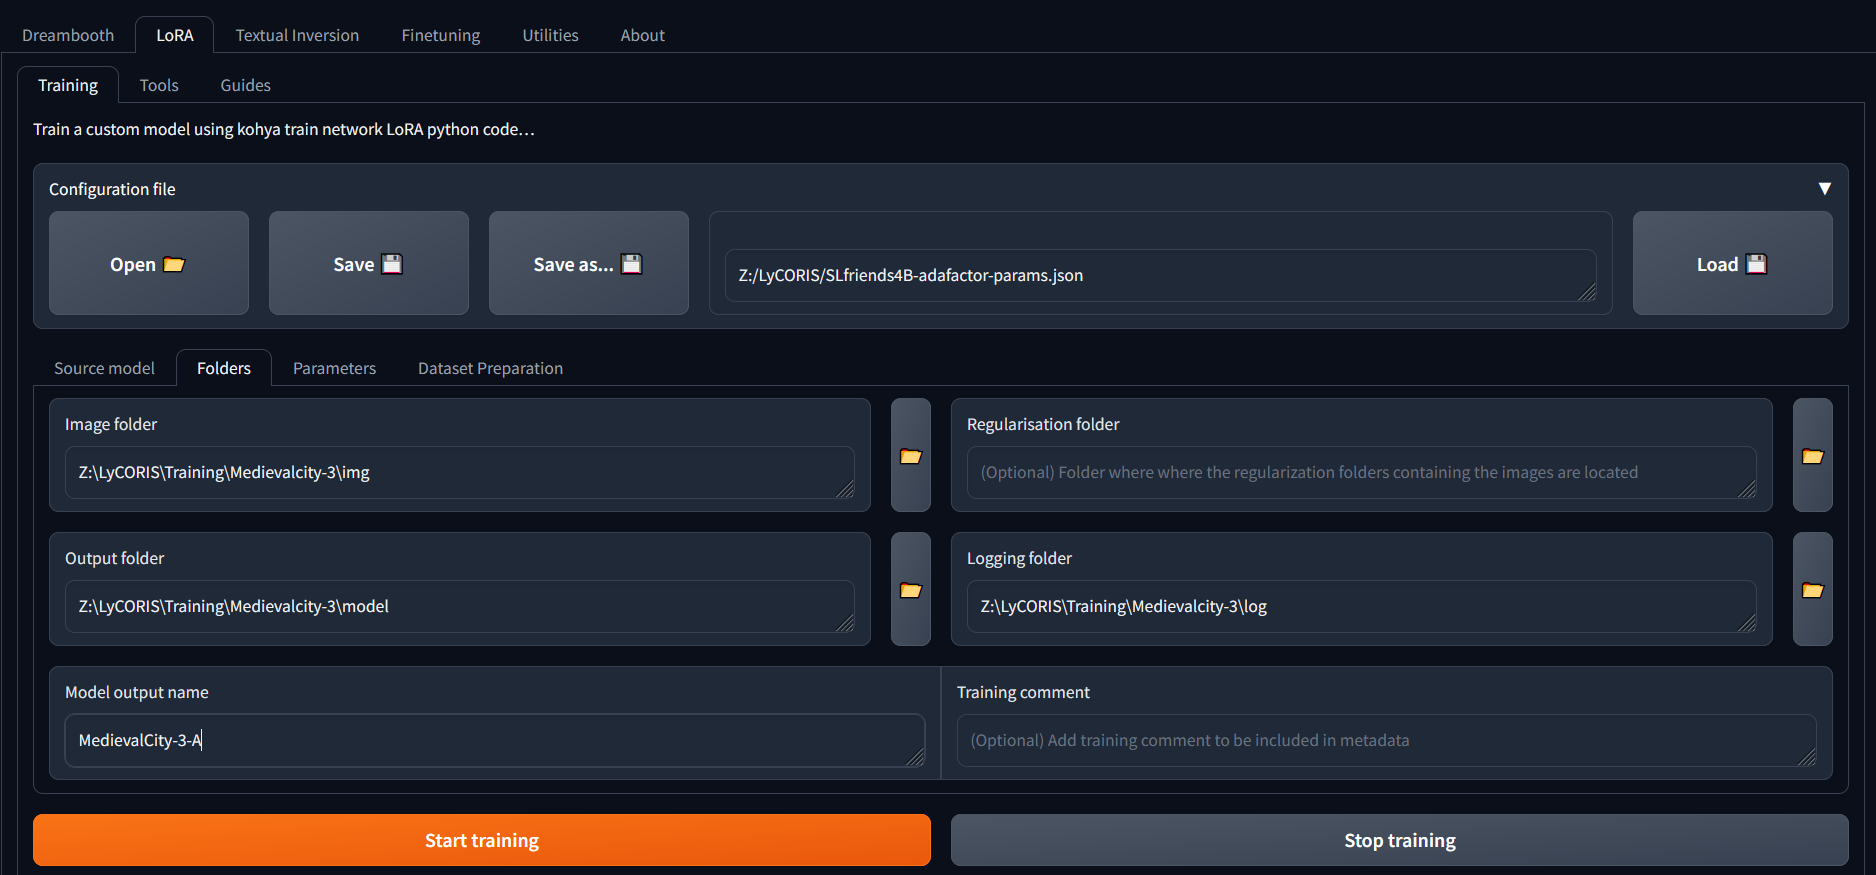
- The json file link (next to the "Save as" button) contains the training parameters from the last time, and we'll use the Kohya UI to adjust where we want.
- The Input folder is the top level of where you stored you images
- The Output folder - self evident. However, start thinking about naming conventions. We're using a number (version) for any retraining with new images, and a letter (version) for a training with same images but different parameter settings. Think build numbers.
- Regularisation folder. If you are trying to make sure that your training does not loose the original meaning of a caption, you can also feed a lot of generic images to counteract your specific ones. However - IMHO since you can turn a LoRA on/off by including it in the prompt, and you typically WANT your subject to be what you trained for, we're not using this.
Considerations:
- if your base model(s) already has knowledge of the subject you're trying to train: don't fight the model! Use a different tag to identify your subject.
- So - if Stable Diffusion already knows "Medieval City" as something very different, caption your images as "Widget City"
- But if Stable Diffusion already knows as "Medieval City" as something very close, now you can leverage this and adjust the weights to get something prompted for as 'Medieval City" to be closer to your images
- To use the LoRA, you include it in the prompt. Therefore, it is okay if your LoRA adjust a subject to something new or different - since the LoRA way of seeing things is only used when you ask for it!
- A strong LoRA will outweigh anything else. What you get back from your generated image is basically the images you fed it. You get a strong LoRa with giving it many images and a strong training (or very few images and lots of training, lots and lots of steps - a LoRa will ONLY give you exactly what you trained it on).
- A weak LoRA will only slightly influence your image generation.
- Note that in your prompt, you can specify how much to 'bump up or down' your LoRA effect
Parameters - Basic
Here's where the fun starts! There are so many knobs to turn, and a lot of opinions out there of what to set them to ! I will give you what I recommend and will link to some of the discussions, in case you want to know more.
Lots of details can be found on AITuts.
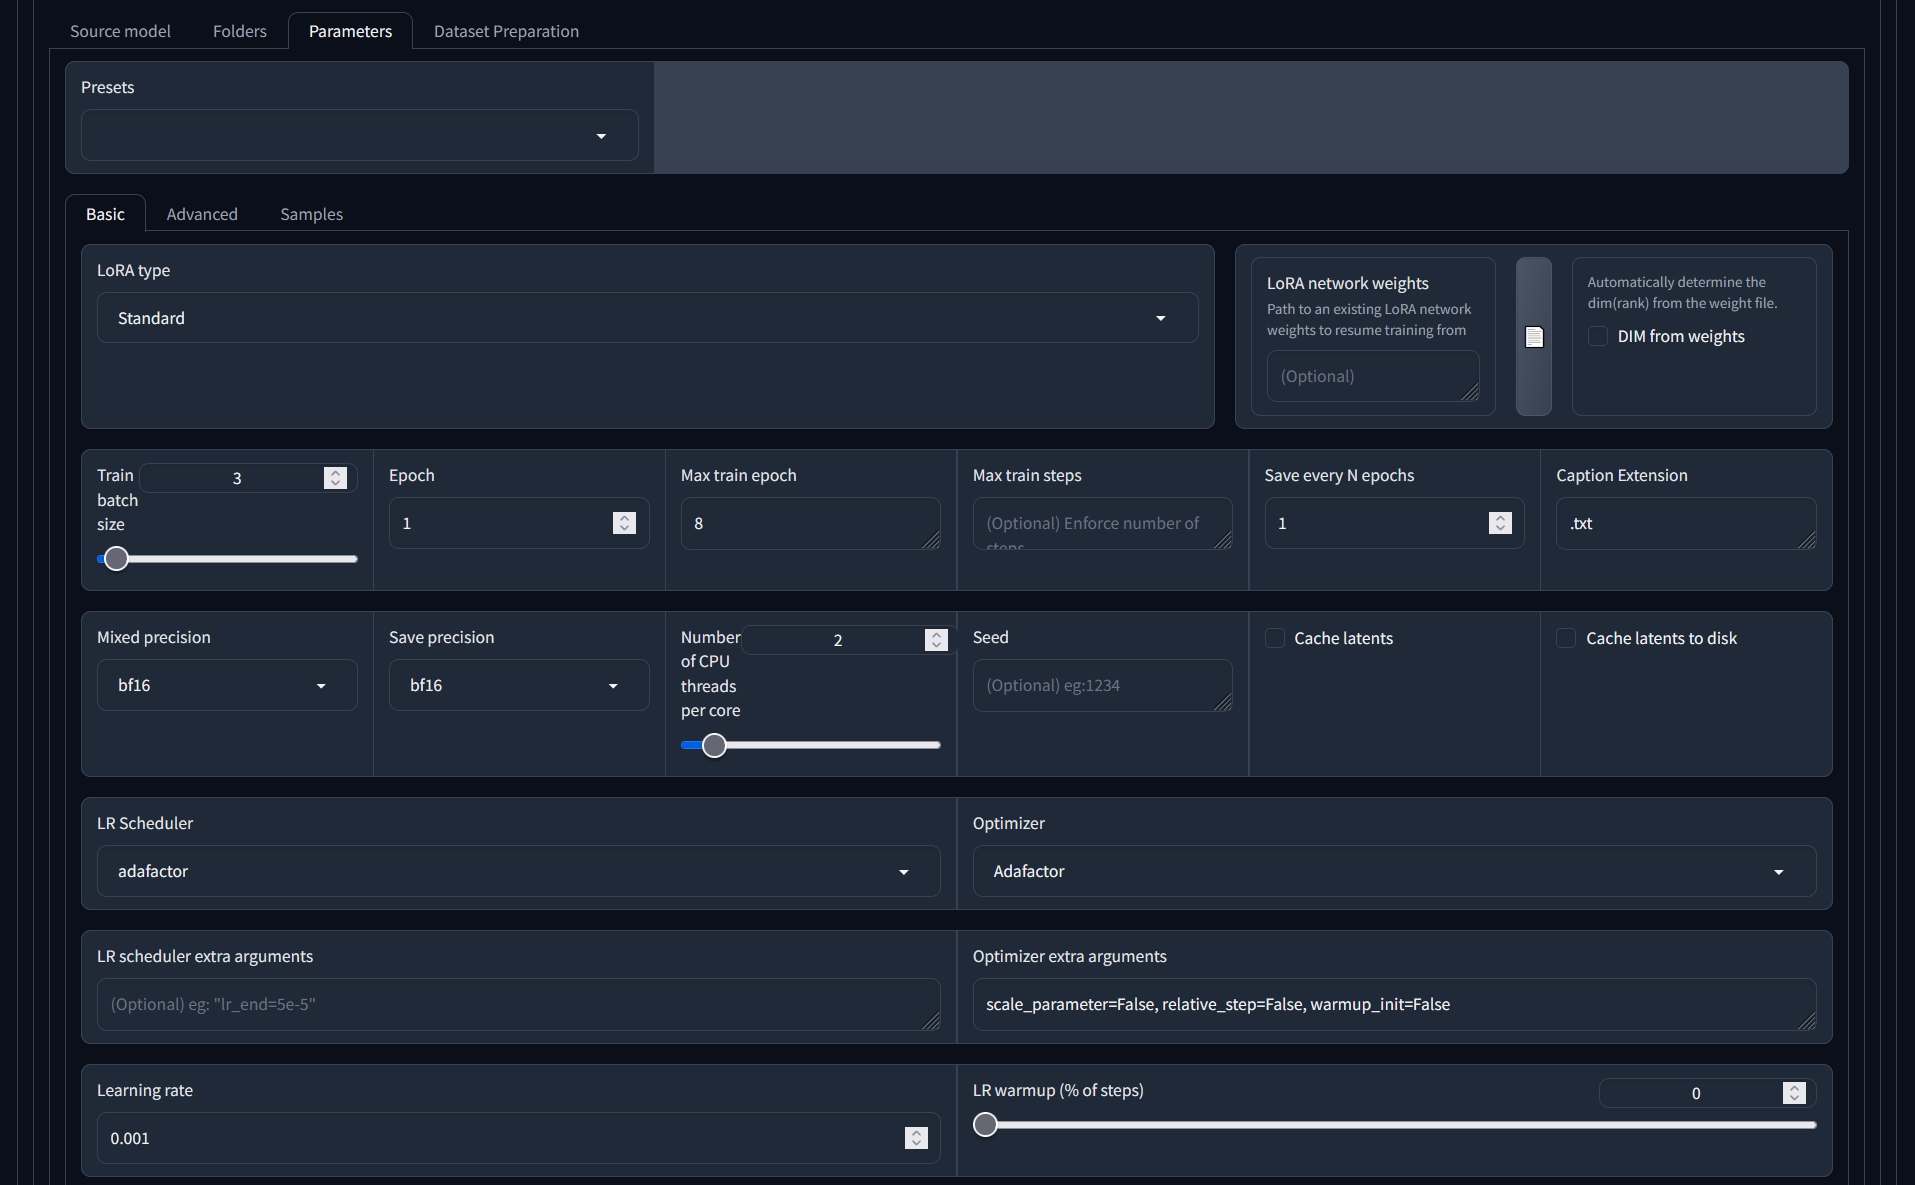
- LoRA type - recommend to use 'Standard'. There is a lot of discussion on the different types, but consensus seems to be starting to point in the direction of 'it doesn't really matter, standard works fine'
- Training batch size - how many images do you want to process at once. The setting should be mainly dependent on the power of your GPU versus the time it will take to run the training. Too high a batch size, and your GPU will take a non graceful exit. Too low a batch size (i.e. selecting 1: processing one image at a time) and the training takes longer and will test your patience.
- Epoch - so much discussion on this training parameter, and it doesn't seem to matter. Leave it at 1.
- Save every N epochs - Recommend to keep a save point after every epoch, but it will take up disk space. This will also allow you to use a save point that is not at the end of the training run, if you want.
- Caption extension - if you used a different extension than '.txt' for your caption files, use can specify it here. My recommendation - just stick with '.txt' :
- Mixed precision/Save precision - gives an indication of the type of precision for floating point encoding that your GPU uses. use 'bf16' for most modern GPUs (more info in Wikipedia - make sure to donate!)
- LR (Learning Rate) Scheduler and Optimizer. Recommend to use Adafactor. Again, lots of discussion and if you're interested, do look it up. The settings determine the schedule of change for the learning rate: the way the learning rate changes over time. Check out the Wikipedia article for more detail.
- Optimizer extra arguments - specific to the Adafactor selection. We've found these settings work better (they tell Adafactor to not ignore the Learning rate parameter below)
- LR cycles & power - optional, and don't bother
- Max resolution - the resolution you want to train at, and the images you provide will be scaled down to this. Setting depends on your base model. For now, a max of 768 for the height and width is what's best for Stable Diffusion 1.5. Once newer models come out, they may be good with higher resolutions - which is why we used our higher resolution images: we won't have to find them again!
- Stop text encoder slider - ignore, doesn't work
- Enable buckets - make sure you select this! This will allow your image source set to have different sizes and resolutions.
- Text encoder/Unet learning rate - if you want to preference focus on learning the captions vs images. Does not work for Adafactor, so ignoring in this case.
- Network rank - how big will the LoRA be. Ignore the slider, type in the number. setting of 128 will get you a LoRA of approx 150Mb. For a single subject, a LoRA of 16 may be fine (18Mbs roughly). The bigger the number, the more neurons, more pathways in the neural network, more weights. Storage is cheap - go minimum 64 rank. Smaller rank will be faster to train - but who cares?
- Network alpha - if alpha and rank are the same, the alpha has no effect. It cannot be higher than the rank. Lower alpha than the rank reduce the strength of the LoRA. So - don't! Keep the alpha close: the same or slightly less than the rank. We will use an alpha slightly less than the network rank, and with the number of images we have and these training rates, this hopefully will give a LoRA we can use at .8 weight in the prompt where it doesn't overpower the base and our prompt, but still influences it enough.
- Remaining options - read them, but recommend sticking to the defaults.
Parameters - Advanced
It says advanced - but you still need to look at this! Luckily most of these can be left at their defaults; we only changed the following:
- The checkbox next to 'weighted captions' allows you to use weights in your training caption files for your images. I didn't do that, but it doesn't hurt. Similar to in your generative prompt: use brackets etc)
- Shuffle caption - if you use commas to separate your captions, this will randomly shuffle the sequence to make it more 'random' - if that's what you want. On second thought, we only have a few captions, and the most important thing has been the first, so we actually switched this off. Most useful for training for a style, and we're training for concept.
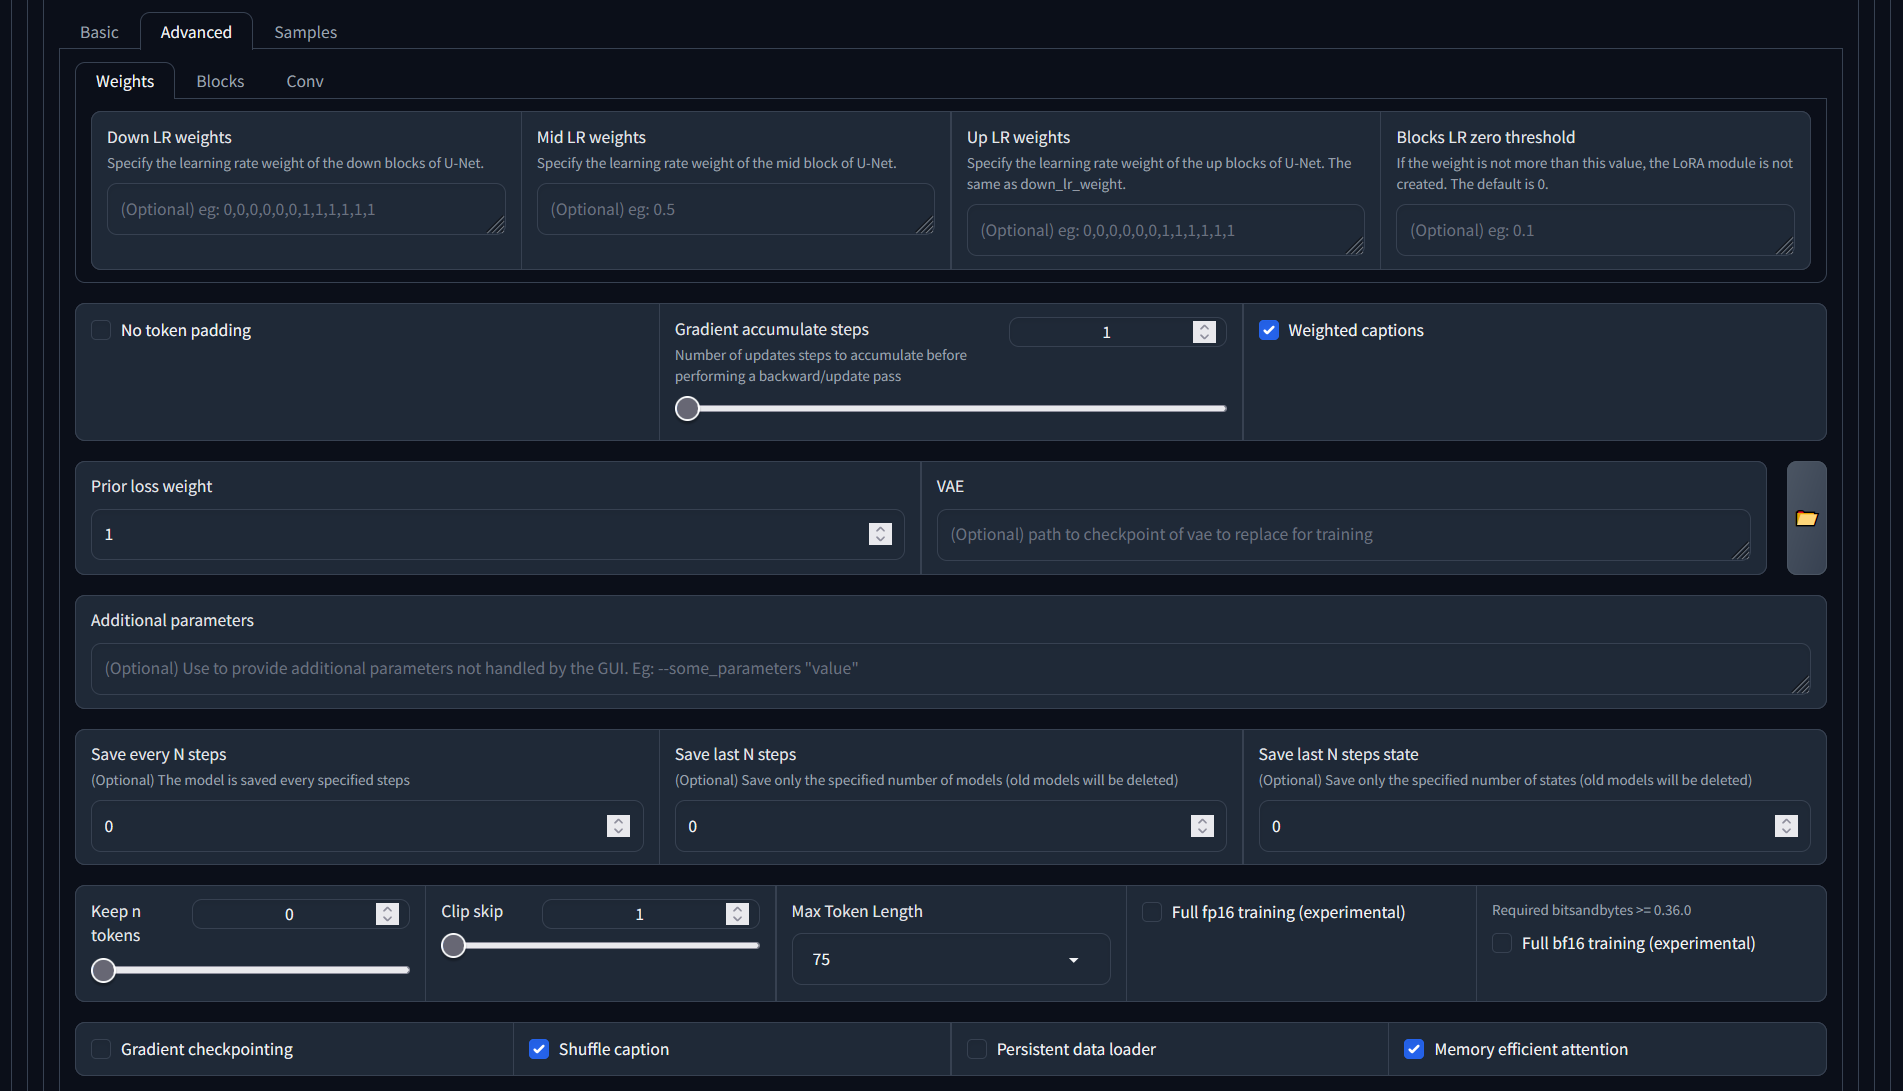
- Color augmentation will randomly change the colors in certain images during an epoch, to create more variety to the training set
- Flip augmentation will randomly flip certain images during an epoch, again to increase the variety. Avoid clicking this if for your training, you want to keep the asymmetry that your images have. With the number of images we have - probably not that important.
- Make sure the 'don't upscale bucket resolution' stays checked - you don't want to change your small images.
Parameters - Samples
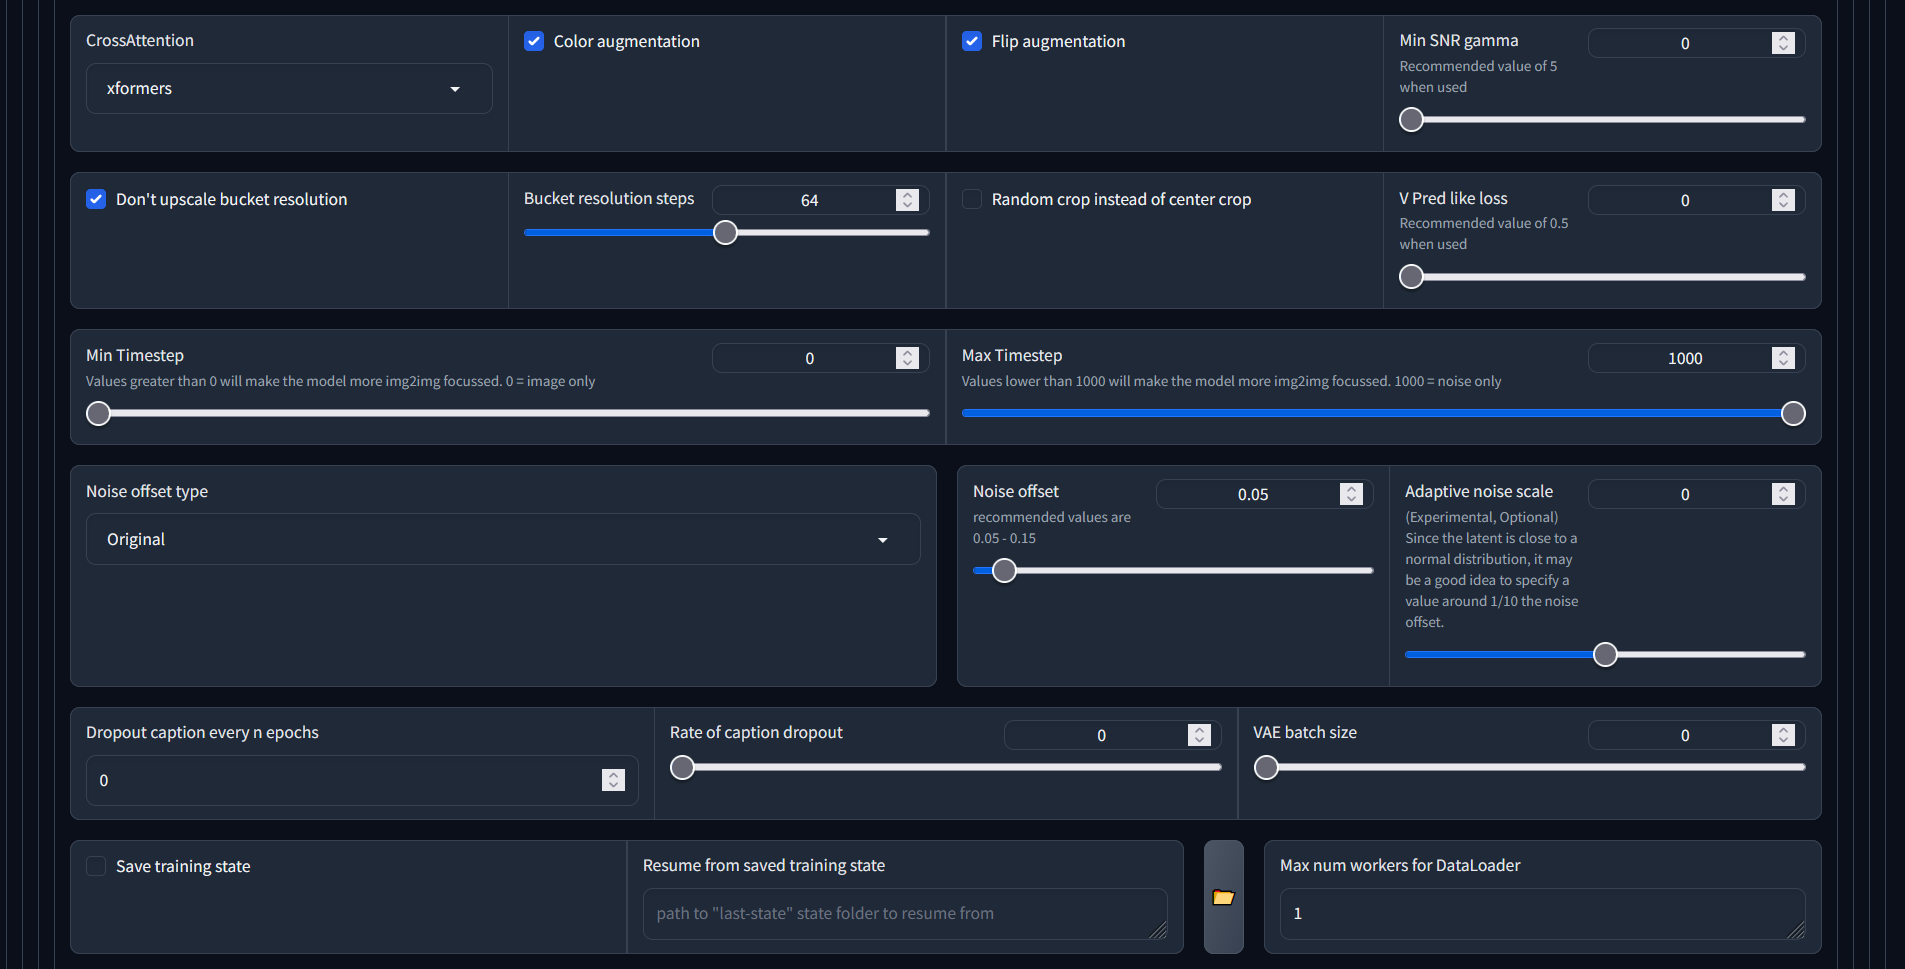
This will allow you to specify the prompt for generating the sample images during training. We've found that the sample images look fully weird all the time - but no one wants to have a silent process, this at least gives you the satisfaction of some feedback during training.
Recommend for the prompt to use the caption that you predominantly used for your training set - this should give you the best confirmation! Also include the negative prompt: we are expecting photos, not paintings.
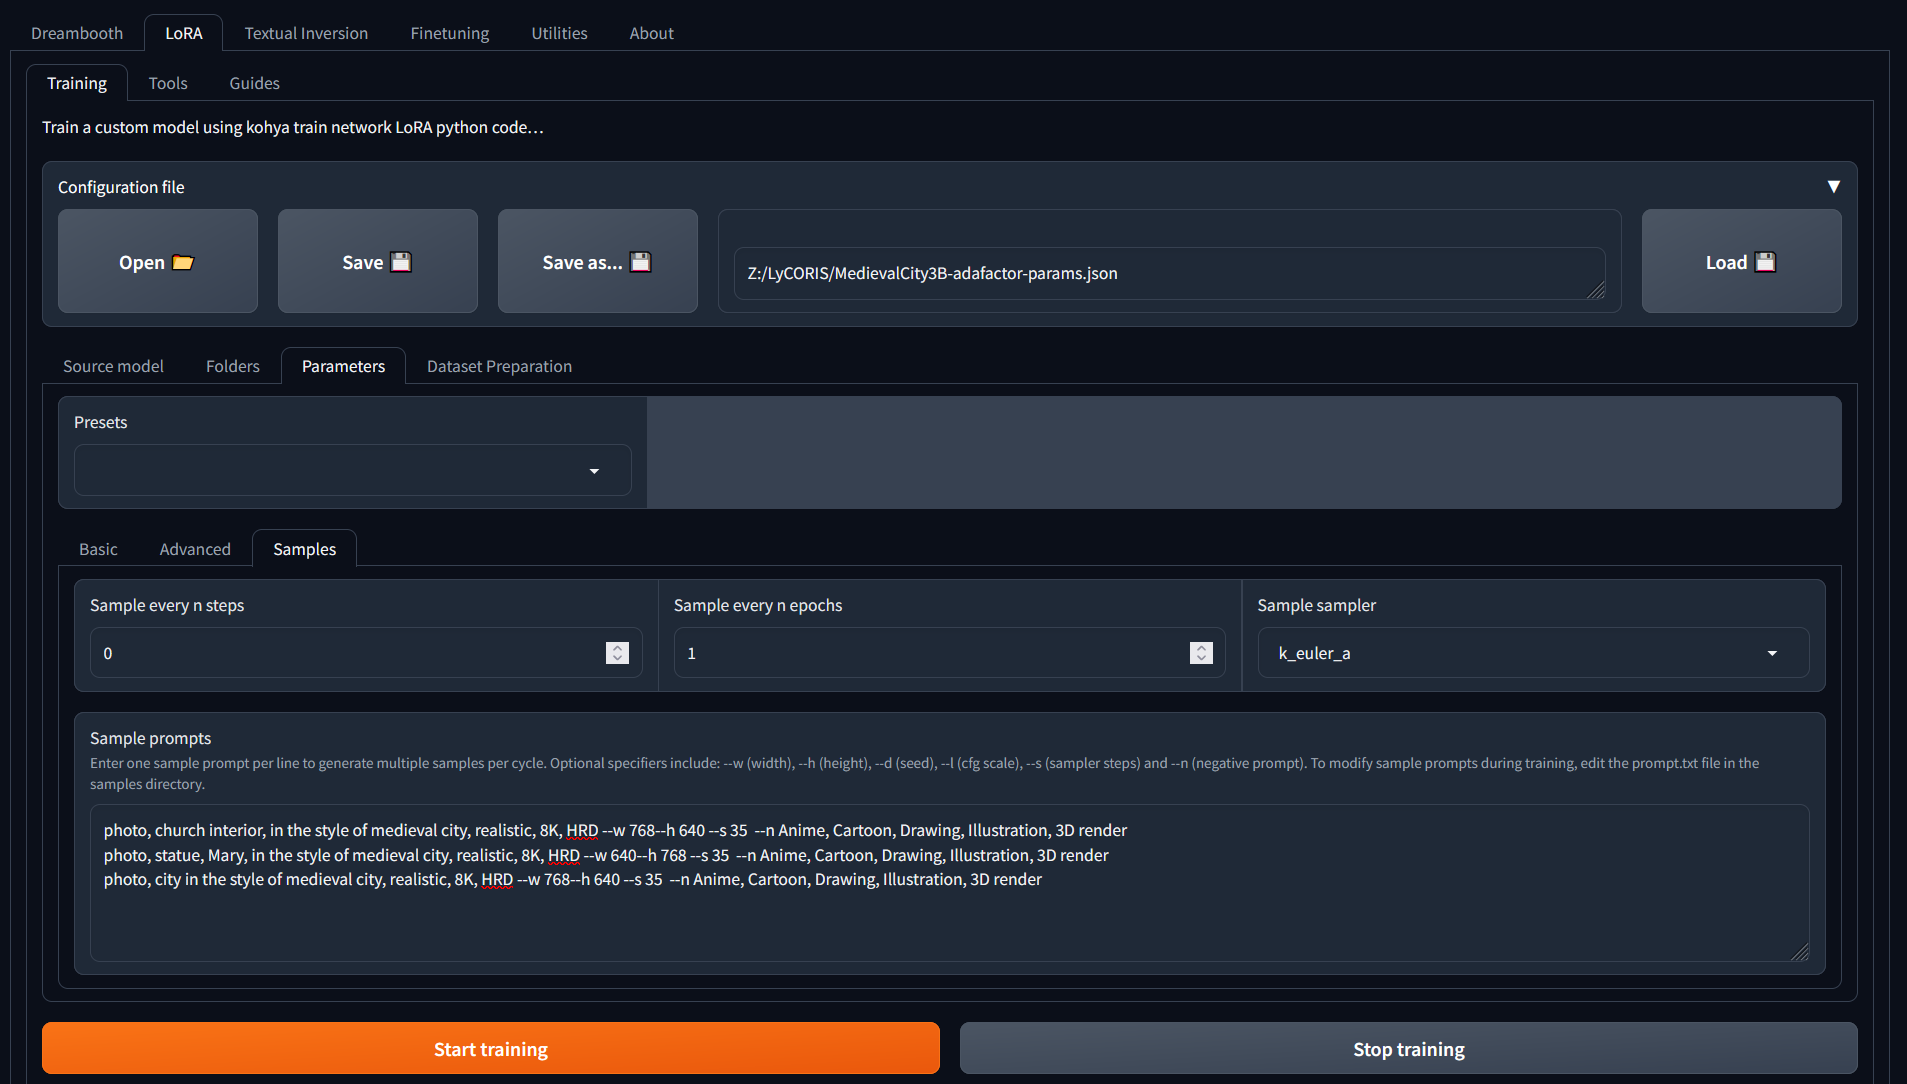
Training
And then... we wait

Very soon after starting, the training run failed on corrupt jpg images. Using a newly found utility badpeggy to find the offending ones and trying again :) Thank you badpeggy - would give you credit if we could find your owner!
Training

and we can see the images being 'bucketed' into the various resolutions and repeats being applied:
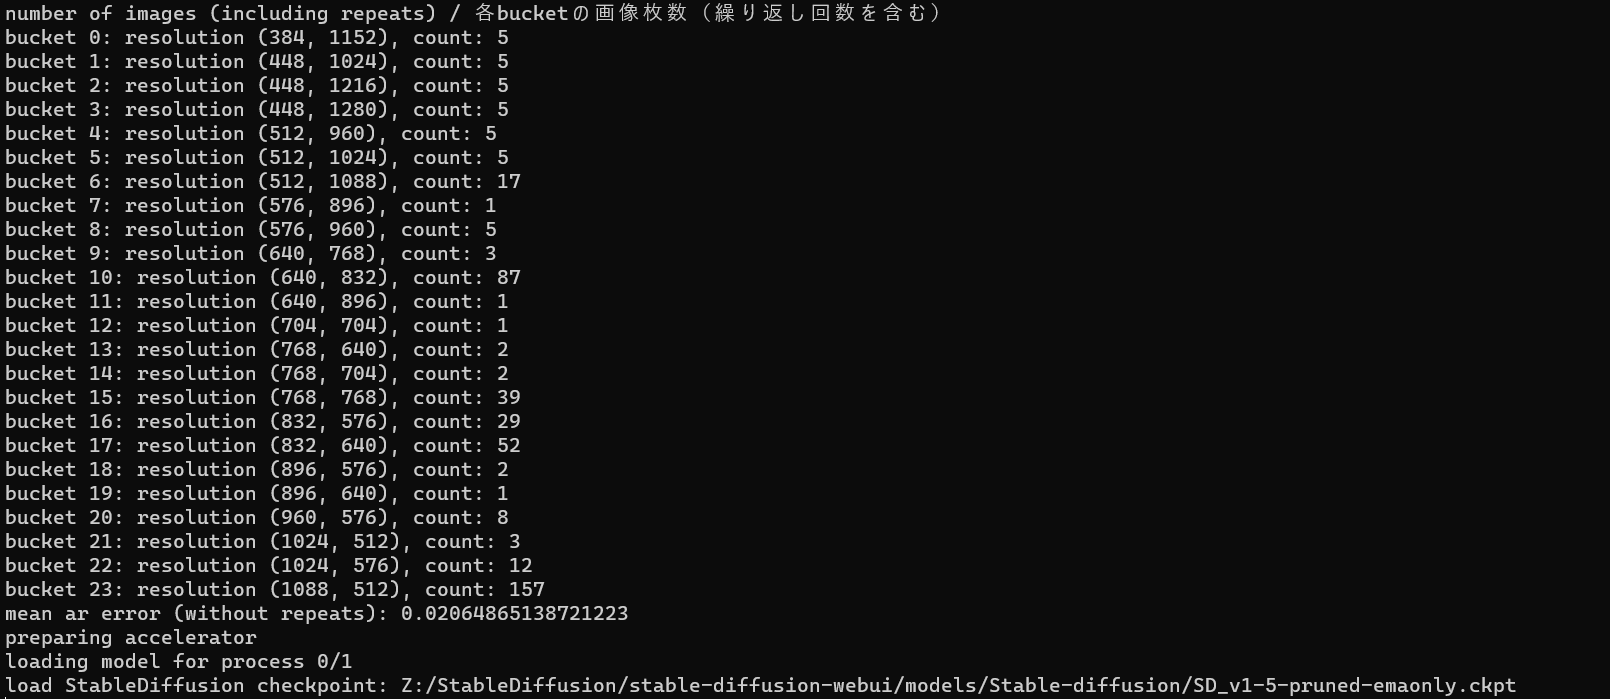
and the training being kicked off with the parameters we specified:

First samples...
Remember that our parameters for the samples were as follows:
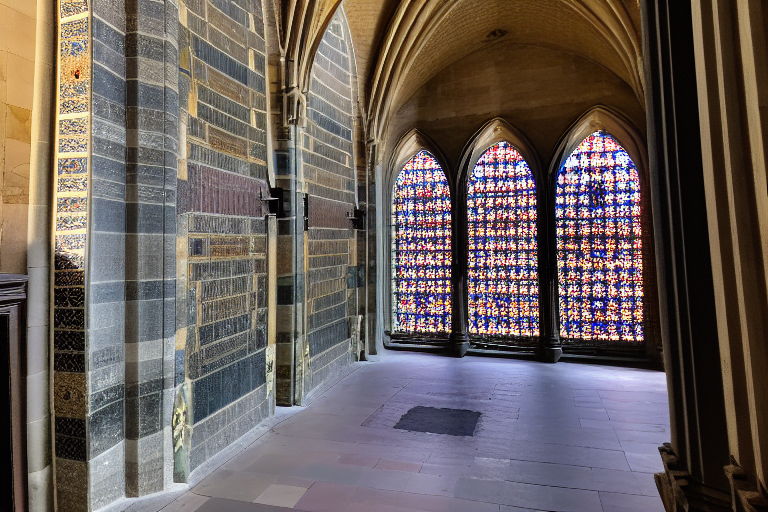
- photo, church interior, in the style of medieval city, realistic, 8K, --w 768--h 640 --s 35 --n Anime, Cartoon, Drawing, Illustration, 3D render
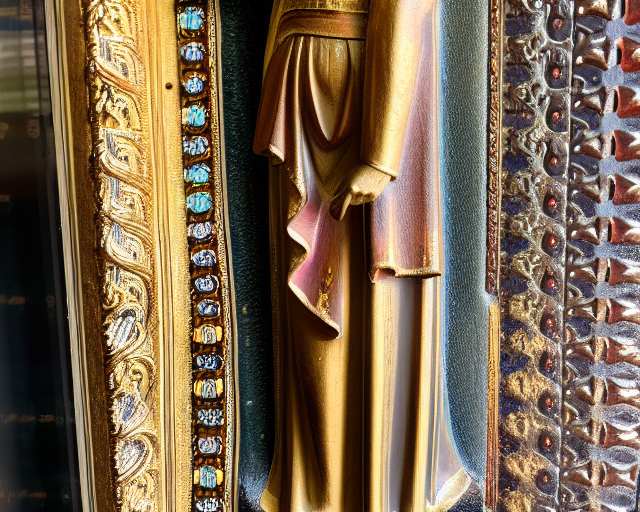
- photo, statue, Mary, in the style of medieval city, realistic, 8K, --w 640--h 768 --s 35 --n Anime, Cartoon, Drawing, Illustration, 3D render
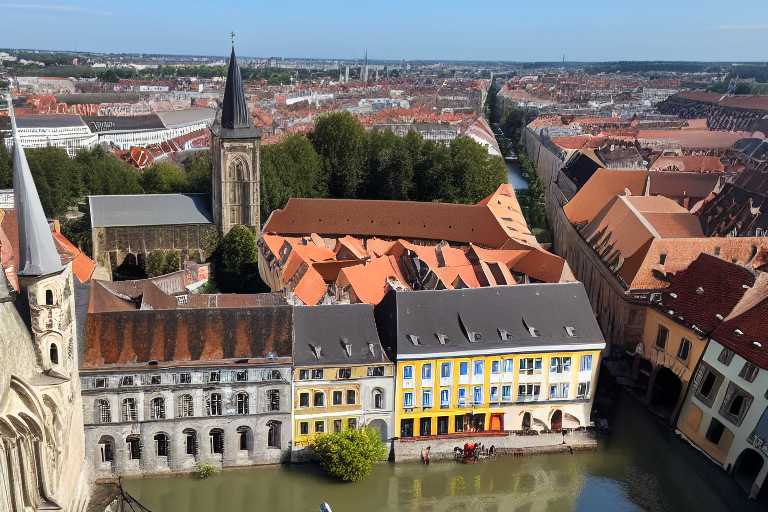
- photo, city, in the style of medieval city, realistic, 8K, --w 768--h 640 --s 35 --n Anime, Cartoon, Drawing, Illustration, 3D render
Based on these prompts, here's the first epoch. And now we have to wait another... two hours???? Going to bed, see you in the morning :)
Final samples
And after the full training run of 8 epochs:
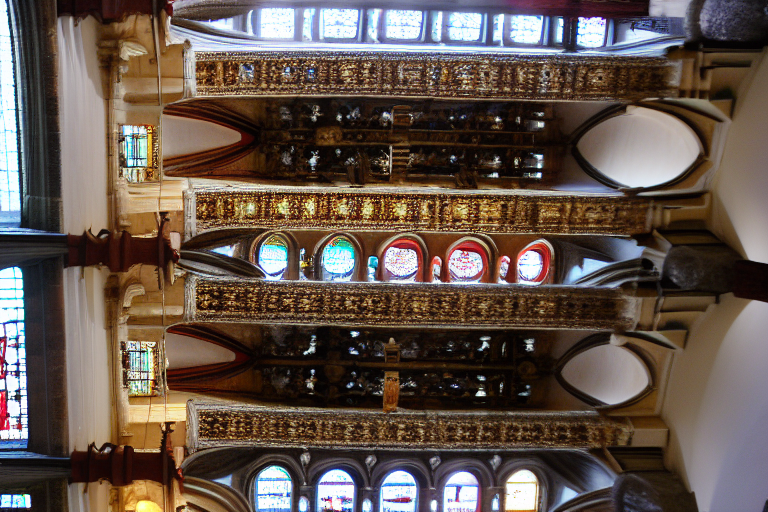
This one is very interesting, and tells us that most likely there are images in the source folder that are actually sideways, even if they don't look it. Will have to find the offending ones and remove. I think this folder also still has some poor quality/low res/out of focus images and can do we a cleanse altogether.
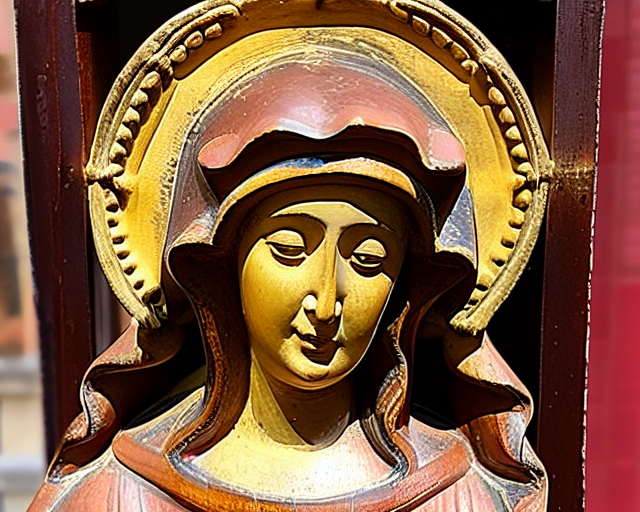
Mary is quite interesting though more colorful than I would've expected
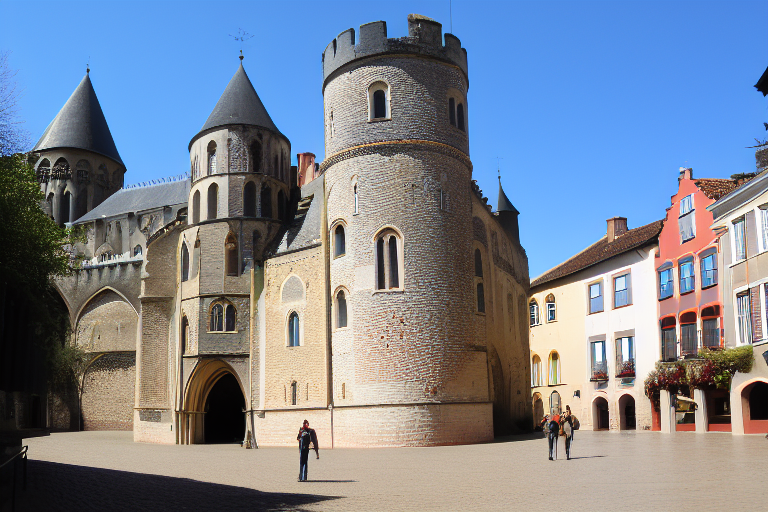
And love the city image!
Training results![]()
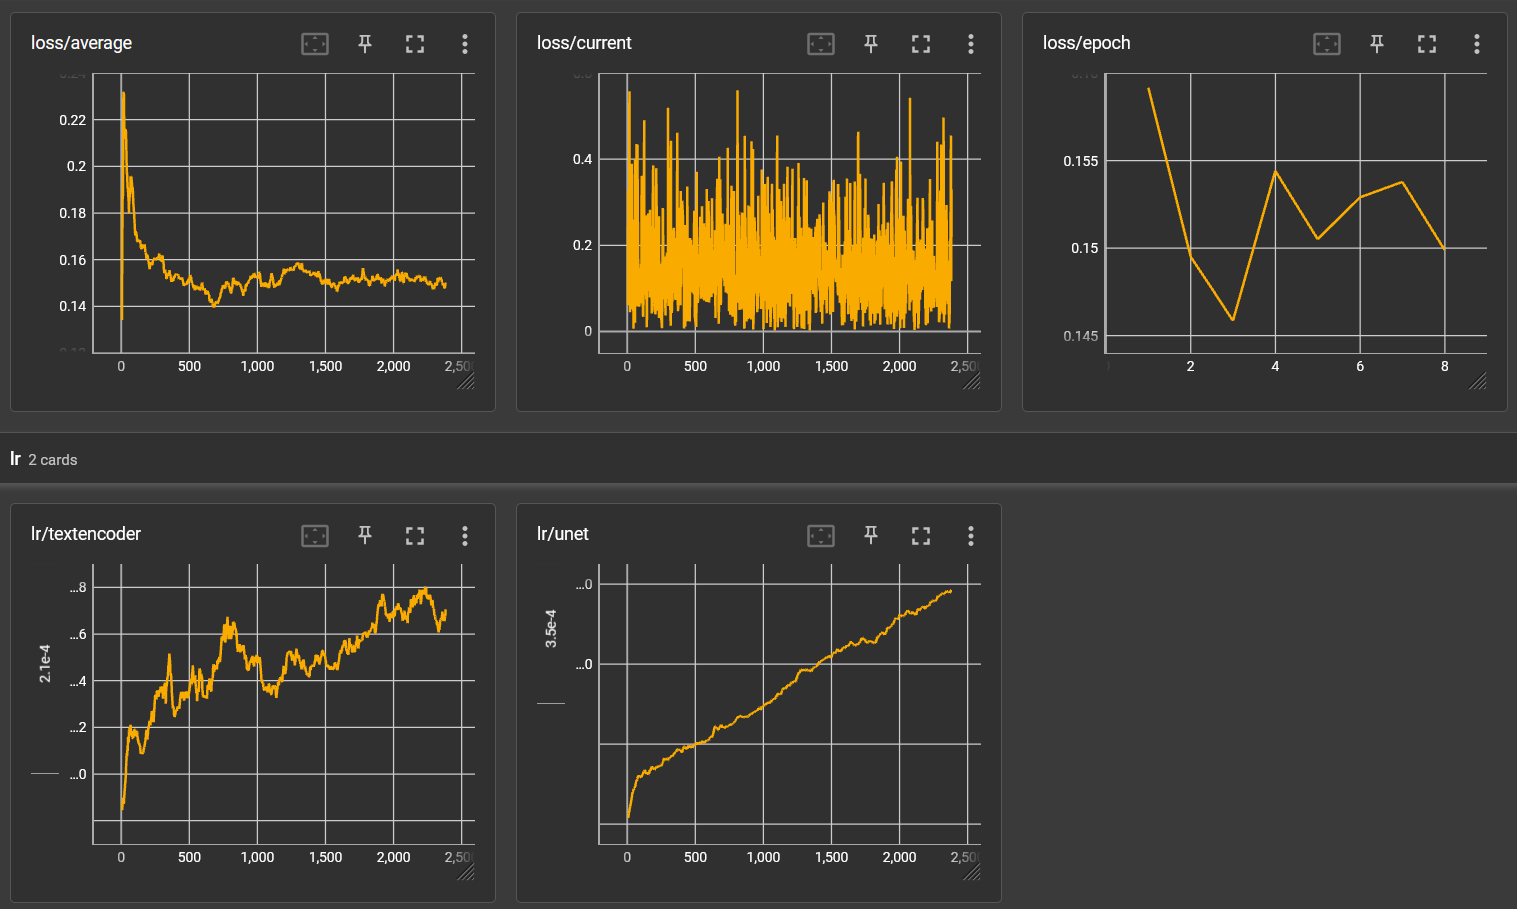
It takes a lot of math to really understand what these graphs are telling us. But in my simple mind, here's what I'm reading:
- Loss/average had stabilized
- Loss/epoch was still fluctuating, so I think we need more epochs
- LR/textencoder was still going up overall, so the captions could still need more training
- LR/unet definitely still increasing and the net needs more training on the images
TensorFlow computations are expressed as stateful dataflow graphs. The name TensorFlow derives from the operations that such neural networks perform on multidimensional data arrays, which are referred to as tensors.
Tenserboard - tracks training over time [button] hit this from Kohya, right below the 'start training' button, can click this any time
Tenserflow - library that trainers and generators use, in (?) pytorch library
Source materials

Comments
Dear vancurious.ca…
Dear vancurious.ca administrator, You always provide in-depth analysis and understanding.
Hello vancurious.ca owner,…
Hello vancurious.ca owner, Keep sharing your knowledge!
To the vancurious.ca…
To the vancurious.ca administrator, You always provide clear explanations and step-by-step instructions.
Add new comment